
How to Export Using Adobe Media Encoder
October 6, 2026 9:15 pmAdobe Media Encoder is a tool I use regularly to quickly convert files, if I need a quick animated gif all the way up to a full fledged video. Adobe Media Encoder is worth having at your disposal.
The program is a standalone program and can convert an array of files. So for my AfterEffects students. Just note that this program is not limited to usage only with AfterEffects.
The program is very easy to use. When you open the program you are greeted with this UI. Let’s take a look around.
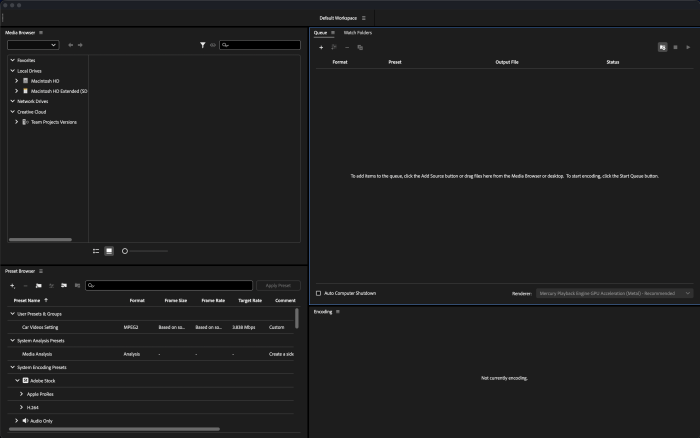
This UI is broken up into 4 sections:
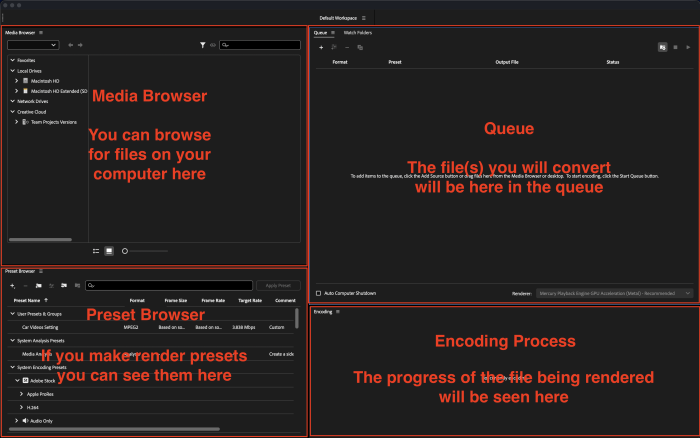
Top Menu
We also have the top menu items:
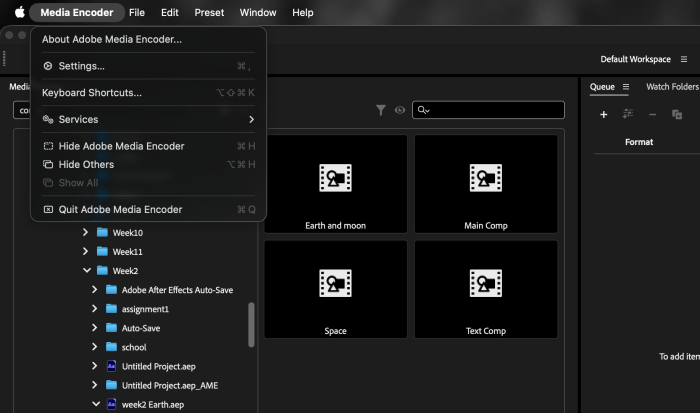
Media Encoder:
-
Preferences: Customize application settings for background rendering, auto-start queues, and default file output folders.
-
Keyboard Shortcuts: View and reassign custom hotkeys to speed up your rendering workflow.
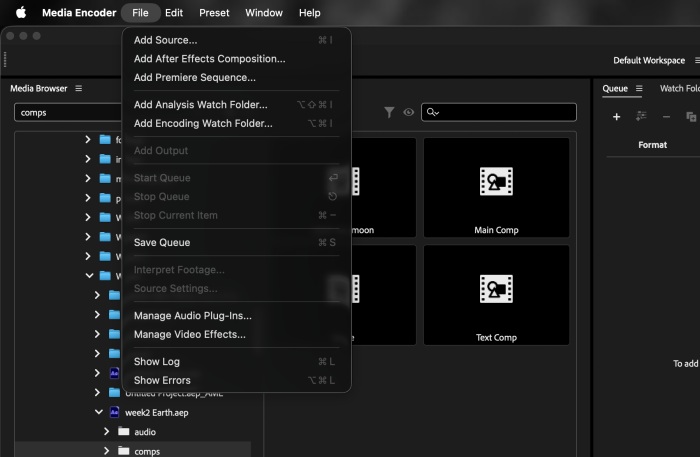
File:
-
Add Source: Import standalone video, audio, or image files directly into the Queue.
-
Add After Effects Composition / Premiere Pro Sequence: Directly import compositions or timelines without opening the main Adobe programs.
-
Add Watch Folder: Set up automated folders that automatically render any media file dropped into them.
-
Start Queue / Stop Queue: Launch or pause the full batch export list.
-
Interpret Footage: Adjust the frame rate, aspect ratio, color space, or alpha channel settings of a source clip.
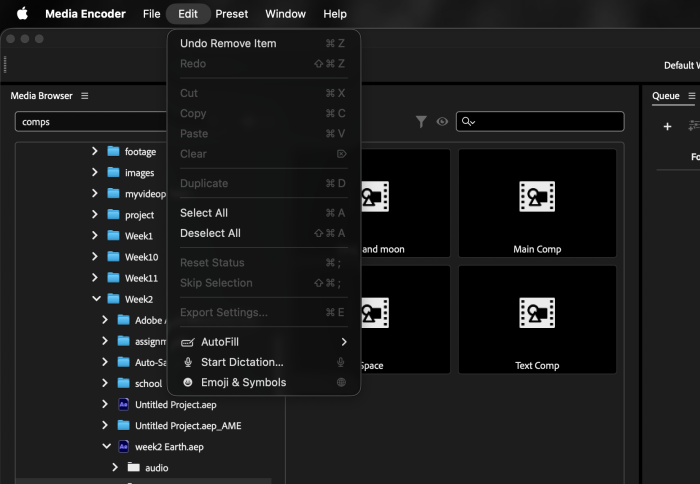
Edit:
-
Standard Clip Actions: Cut, Copy, Paste, Duplicate, and Delete items inside your Queue panel.
-
Export Settings: Open the main export window to manually configure video resolution, bitrate, audio codecs, and file destinations.
-
Queue Management: Quickly select, clear, or reset the export status of items in your queue (e.g., set completed jobs back to “Ready”).
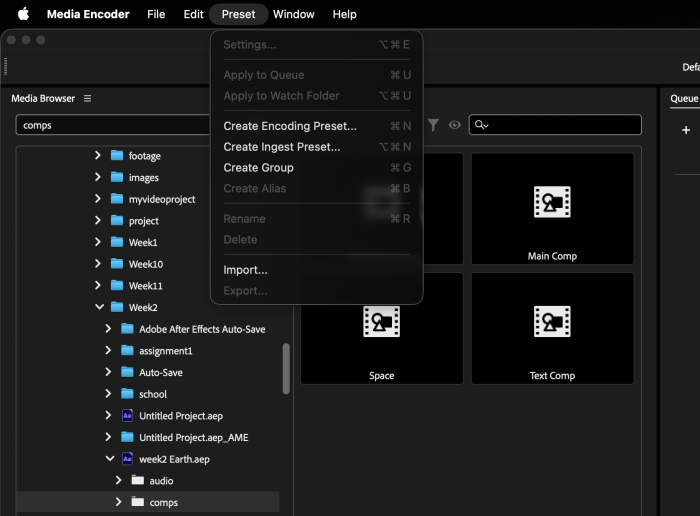
Preset:
-
Create Encoding Preset: Build custom export presets (e.g., custom bitrates, specific dimensions, or watermarks) tailored to your project needs.
-
Create Ingest Preset: Build automated rules to proxy, transcode, or copy media files upon import.
-
Create Preset Group / Alias: Organize your custom presets into folders or create shortcuts for frequently used settings.
-
Preset Settings: Edit, rename, or delete existing user presets and manage where preset files are saved on disk.
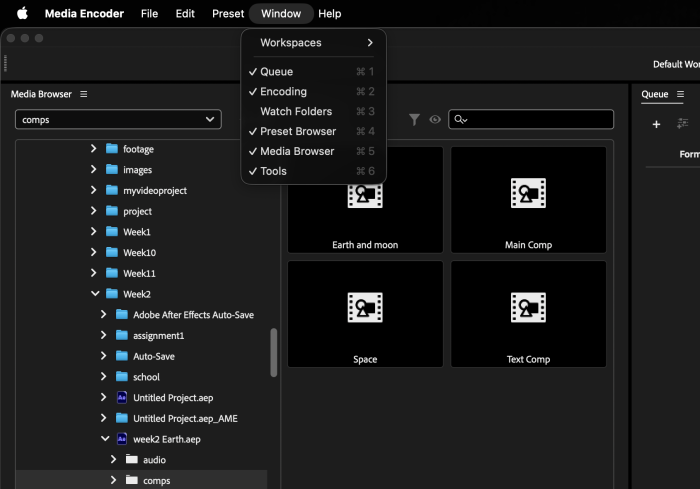
Window:
-
Reset & Manage Workspaces: Restore default panel layouts or save your own custom workspace setup.
-
Toggle Individual Panels: Instantly re-open any hidden or closed panel—including the Queue, Media Browser, Preset Browser, and Encoding progress monitor.
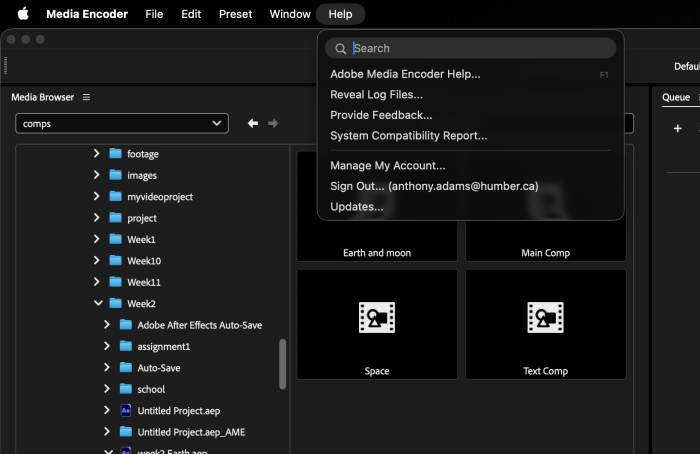
Help:
-
Adobe Media Encoder Help: Search online tutorials and official Adobe user documentation.
-
Updates & Account Info: Check for software updates and manage your Adobe Creative Cloud account or GPU acceleration setup.
You can either use the media browser to find the file(s) you want to convert. Or, drag and drop the file from your Finder or Windows Explorer onto the Queue area of the window. Once you do, you will see the files in the queue to be converted.
Sending Files to Media Encoder
- From Premiere Pro:
Go toFile→Export→Media→ Click Queue (Send to Media Encoder). - From After Effects:
Go toComposition→Add to Adobe Media Encoder Queue
(or press Cmd + Option + M on Mac / Ctrl + Alt + M on Windows). - Direct Drag-and-Drop:
Drag raw video, audio, or image files directly from your Finder (Mac) or File Explorer (Windows) into the Queue panel.
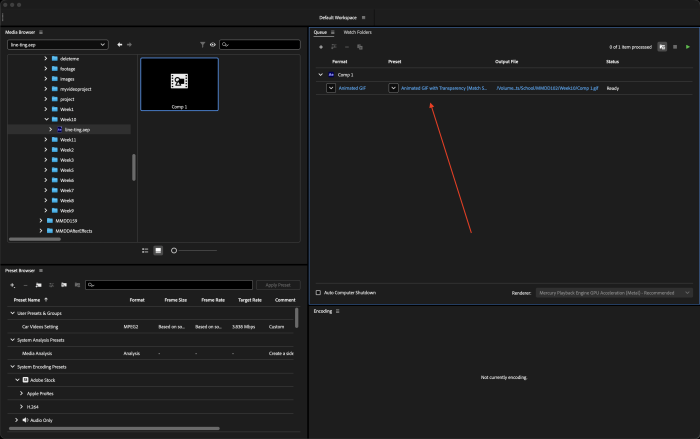
From here there are a few things we can do.
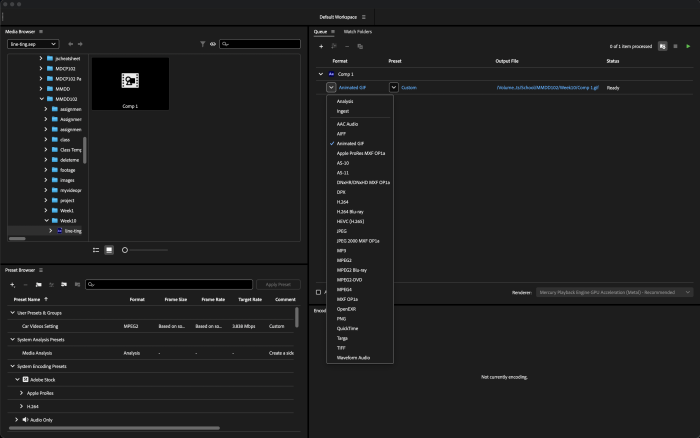
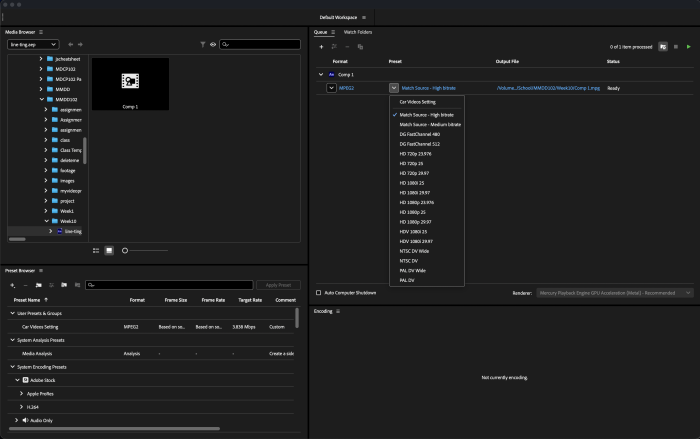
1. We can click the down arrows beside the format and preset to see some quick options:
The format down arrow expands quick choices to choose format. You can choose H.264 (industry standard, general standard used format) if you want an MP4 video or H.265 for a high compression, hi resolution MP4. There are also various other formats like MPEG2 for older videos and legacy tech. Animated GIF and a bunch more.
Under the presets down arrow it expands preset settings.
If click the actual format name OR click on the actual preset name. It will pull up the Export Settings window.
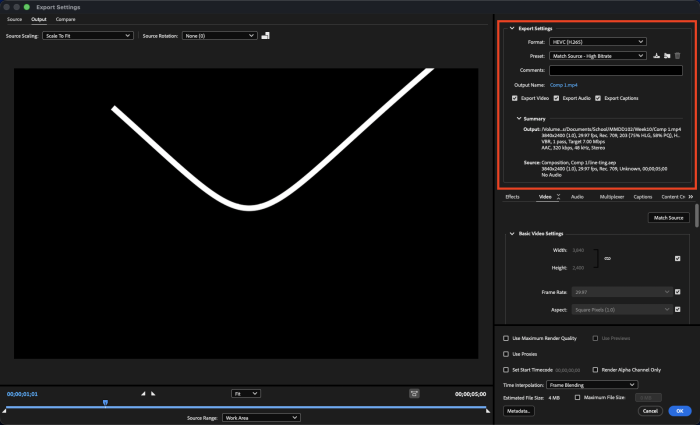
In here you can fine tune various aspects of the export.
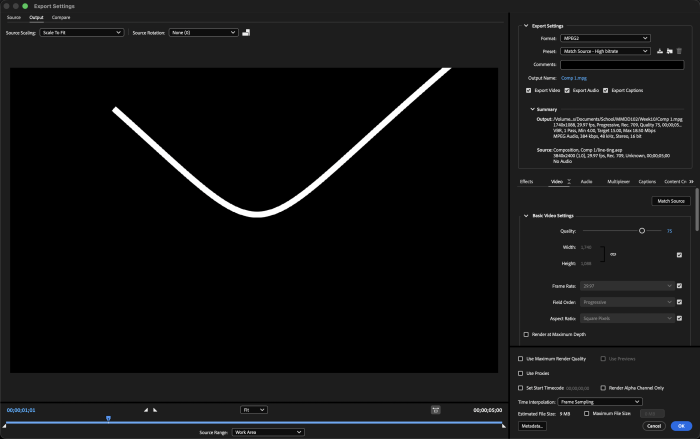
In the Export Settings section you can again change format, change preset, add comments and see the summary.
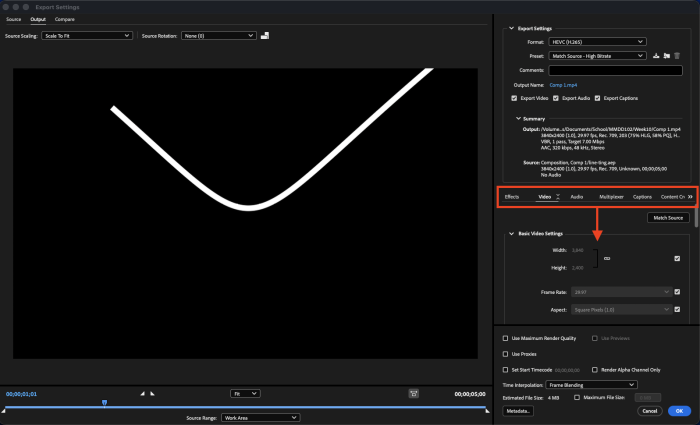
In the navigation in the red box you can show options for different categories. Effects, Video, Audio, Multiplexer, Captions, Content Credentials and Publish.
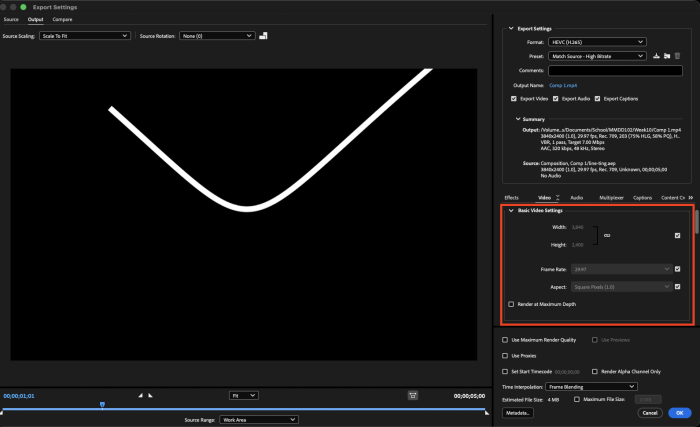
In the Video tab you can edit aspects of the video like the Basic Video Settings, where you can change the Width, Height, Frame Rate and Aspect:
There are also other settings you can change under there like Encoding Settings, Bitrate Settings, Advanced Settings and VR Video.
On the left there is the Output Panel. Here you will see a preview of the video along with:
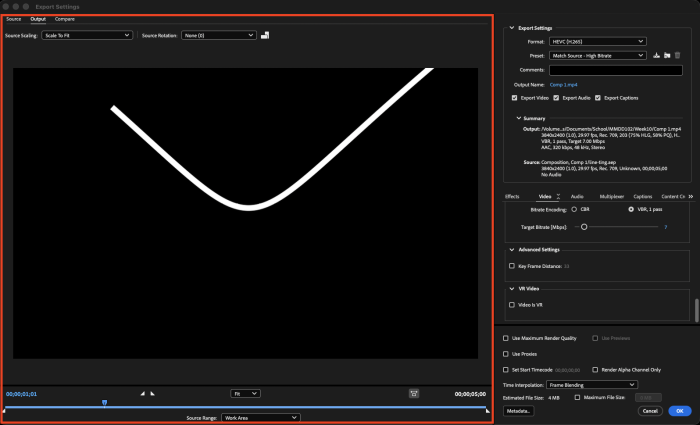
A drop down for Source Scaling. Where you can change the fit of the video.
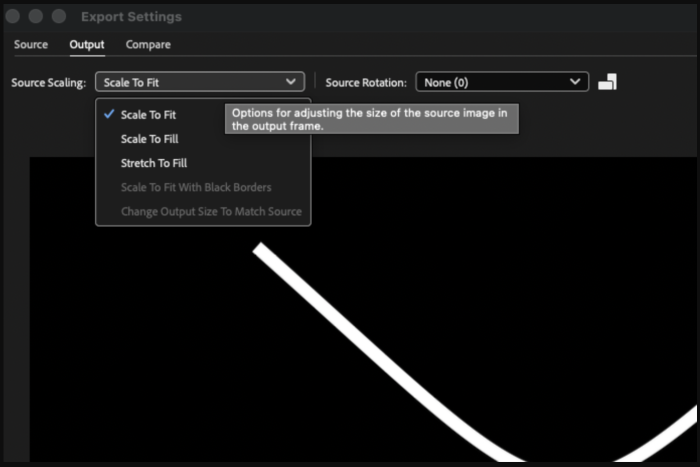
The timeline of the video and a cropping tool to cut the videos start and end points if you need to. Use the small triangles on either side of the bottom time line to crop.

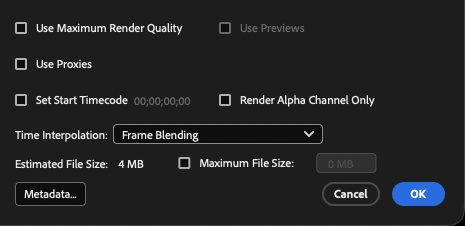
Once your settings are set, press OK.
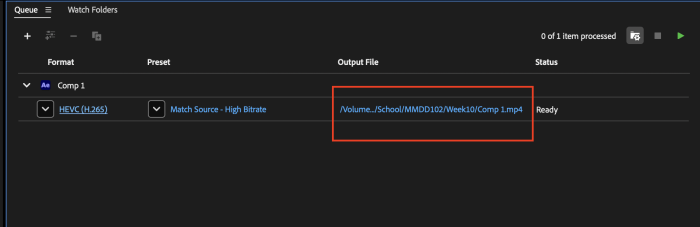
Back on the regular screen if you click the file save location under Output File…
It will open the save location which you can change.
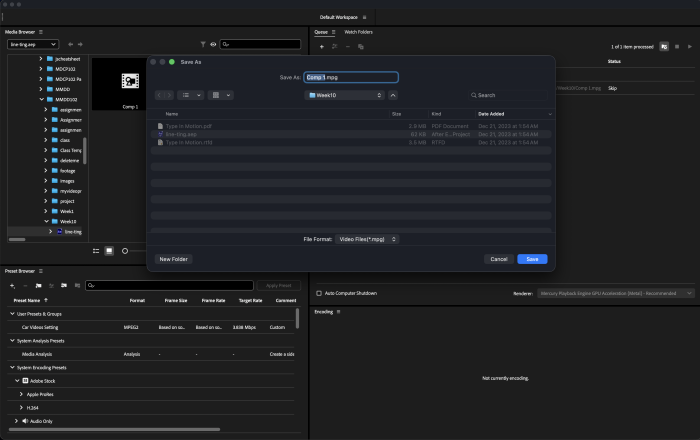
Click Save
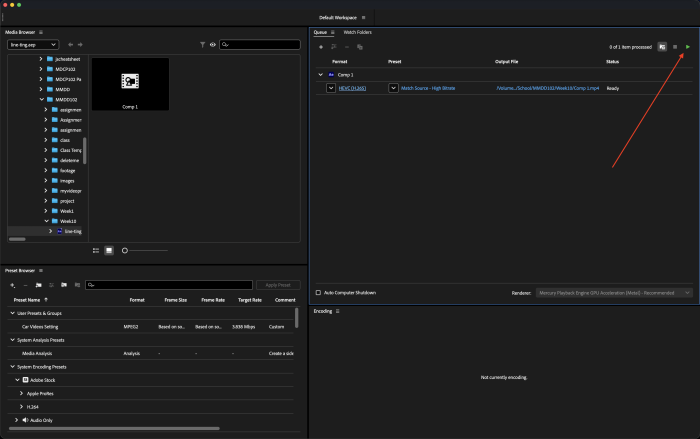
Now that everything is ready to go, press the green play button to render all the files in the queue. Once they are all done (which you will see the progress bar at the bottom) the files will be located where you specified for them to save.
Note that if you have multiple files in the queue. If you select them all and then bring up the Export Settings tab by clicking one of the entries format, what you do to the one will effect the settings for ALL the items in the queue. Which is handy to save time!
Categorised in: Blog, Lectures, MMDD 102
This post was written by amax
Comments are closed here.