
WEBD 150 – Intro to Servers 2
April 4, 2024 12:42 pmIntro to Servers 2 – Web-mastery and FTP
What does a Webmaster do?
Handles/Maintains 1 or many websites, hosting accounts, servers.
Oversees all aspects of website(s), solve technical problems, approve site content, change site content, UI Dev, functionality, work with designers and so on.
Terms
WHM – Stands for Web Host Manager This is what we use to manage vded or fully dedicated servers. It is a powerful tool and if you don’t know what you are doing you could break an entire server hosting many websites. We will not get into this yet. For now you will not need to know anything to do with this as we are only learning about smaller scale web-mastery.
ISP – Internet Service Provider. Who supplies us our internet access. (cogeco rogers, bell, verizon so on).
Domain Name – This is what we purchase from a registrar so that we can provide a symbolic representation like an easily memorable name to a numerical number. If humans were good at remembering numbers we wouldn’t need these, but because we use words, we use domain names and resolve them to IP addresses.
Top Level Domain (TLD) – A TLD is a the extension like .com .net .gov .ca .org and so on. This used to be limited but now there are all kinds. From countries to things and even .wtf is a TLD now. Some of these are restricted. Like when we use a .ca you have to be a Canadian to do so.
Second Level Domain (SLD) – Directly below a TLD in: example.com “example” is the SLD.
Sub Domain – If you own a domain name (example.com) you can make a whole new site within that domain using a sub domain (help.example.com). Depending on the shared hosting you have (and if you have access to cpanel) the procedure for this might differ. Can also be thought of like a third level domain. example.co.uk or example.on.ca
DNS – Domain Name System. This is a hierarchical naming system. It serves as a kind of phone book for the internet, resolving domain names into IP addresses.
DNS Records – DNS records basically are a list of records that point things where to go Zone Records, Resource Records and so on.
A list of most common records is provided below:
• Address Mapping records (A) – Points the domain to an IP address
• IP Version 6 Address records (AAAA) Same as A record but uses a IPv6
• Canonical Name records (CNAME) Specify an alias domain name
• Mail exchanger record (MX) Resource for mail exchanger. You can port your emails through your own server or you can use google and point to that for example. (later lesson)
• Name Server records (NS) Points to a Name Server. NS1 NS2
IP – An Internet Protocol Address is something that every machine has. Your computer, phone, server, printer, robot and android (coming soon lol) all have one. Even though every machine has a unique IP, every ISP assigns a private IP to a network. So if at home you have 2 computers and 5 phones on that network, all of the machines on the network will share 1 private IP address. These private IP addresses prevent people from getting in to the network.
EG 69.89.31.226
Note Websites can be reached and viewed with ip addresses instead of the URL (unless the webmaster forces the IP to resolve to the URL in which case when you enter a website by its IP it will go to the site and switch the IP to the domain name in the browser automatically)
URL – Uniform Resource Locator. It is a reference (address) to a resource (file on a server, website)
There are 2 parts to a URL:
A Protocol Identifier – http://
A resource Name – yoursite.com
FTP – Stands for File Transfer Protocol. This is how we have been connecting to our shared hosting accounts. It is just a protocol. It can also be used in place of www. in a browser.
Name Server – A name server is permanently connected to the internet and translates domain names to IP addresses. If you have a vded or dedicated server you can make your own name server.
An example of a name server is:
NS1.EXAMPLE.COM
NS2.EXAMPLE.COM
.htaccess – htaccess is a configuration file for apache servers. Some shared hosting accounts allow the use of these and some do not. If you run a vded or dedicated then you can implement these at will. To do so, make a file in the public_html folder and name it “.htaccess” Than, in the text of that file you can enter commands. .htaccess files can also be places into sub directories. An .htaccess file is not a file extension. Rather, it is the full name of the file. Once placed into the root or subdir it will take effect, though sometimes you may have to wait a little bit for the server to clear its cache. This can be advanced and if you don’t know what you are doing you can cause internal server (500) errors which will break your site until fixed.
php.ini or php5.ini – This is another configuration file for running applications that require PHP. In here we can set upload size limits, memory limits and all kinds of other things.
SEO – Search Engine Optimization. This is how google and other search engines index our sites. SEO is comprised of the information on our sites (which can be written for SEO), the meta info (description in the meta tags):
And the off site SEO (sites linking to your site) and how relevant the content is in the page, to the content on your page as well as many other aspects.
SSL – Secure Sockets Layer. This creates an encrypted link between a server and a browser. If you ever have a site that takes payments you might want to deploy this. To do so you have to purchase one from a provider (godaddy and the like). Prices vary but don’t be fooled by highballers. You can get a cheap one and use that.
SSH – Secure Shell allows you to connect via command line to your server. In mac you can do this using terminal.
Resolving URL
Resolving to the www or the http://
When you register your domain and link the domain to your hosting account/server you would be able to access the resources, in this case say a website, using either the IP address, the www. address or the http:// address As a webmaster. Its common to make a server side command to only resolve users to one of these. (never being the IP) we would either choose the www or the http:// and direct all traffic to one or the other, so for example: If someone tries to use the IP or the www to connect to our site it will direct to the http:// and only use that. It really makes no difference what you choose. Some web-masters prefer the www some the http:// or your client may have a preference.
To implement this we can enter into our .htaccess file the following:
- Example 1 – Redirect example.com to www.example.com:
RewriteEngine On - RewriteCond %{HTTP_HOST} !^www.example.com$ [NC]
- RewriteRule ^(.*)$ http://www.example.com/$1 [L,R=301]
- Example 2 – Redirect www.example.com to example.com:
RewriteEngine on - RewriteCond %{HTTP_HOST} ^www\.example\.com$
- RewriteRule ^/?$ “http\:\/\/example\.com\/” [R=301,L]
Understanding FTP
Understanding FTP may seem complex but simply, FTP is is used to transfer files between two computers over a network and Internet.
If 2 computers are on the same network (like having 2 computers within your home sharing a connection) you can usually just share a drive and be able to access said drive from either computers because they are connected on the same network safely and securely. But, if the other computer is not connected within the same network and is on the other side of the world? You normally would never just share a drive on your computer for the entire world to access across the entire internet as the would leave all of your personal and private data exposed to the world. Enter FTP, the oldest and most widely used method to copy files from computer to computer even ones that have different operating systems.
As we discussed previously:
Transferring files from a client computer to a server = uploading.
Transferring files from the server to the client = downloading.
There are various tools to use to achieve FTP access between computers. FileZilla is one of them however there are plenty more other programs you can use.
Windows
Mac OS X
Unix/Linux
Lets take a closer look at the interface of FileZilla and Dreamweaver:
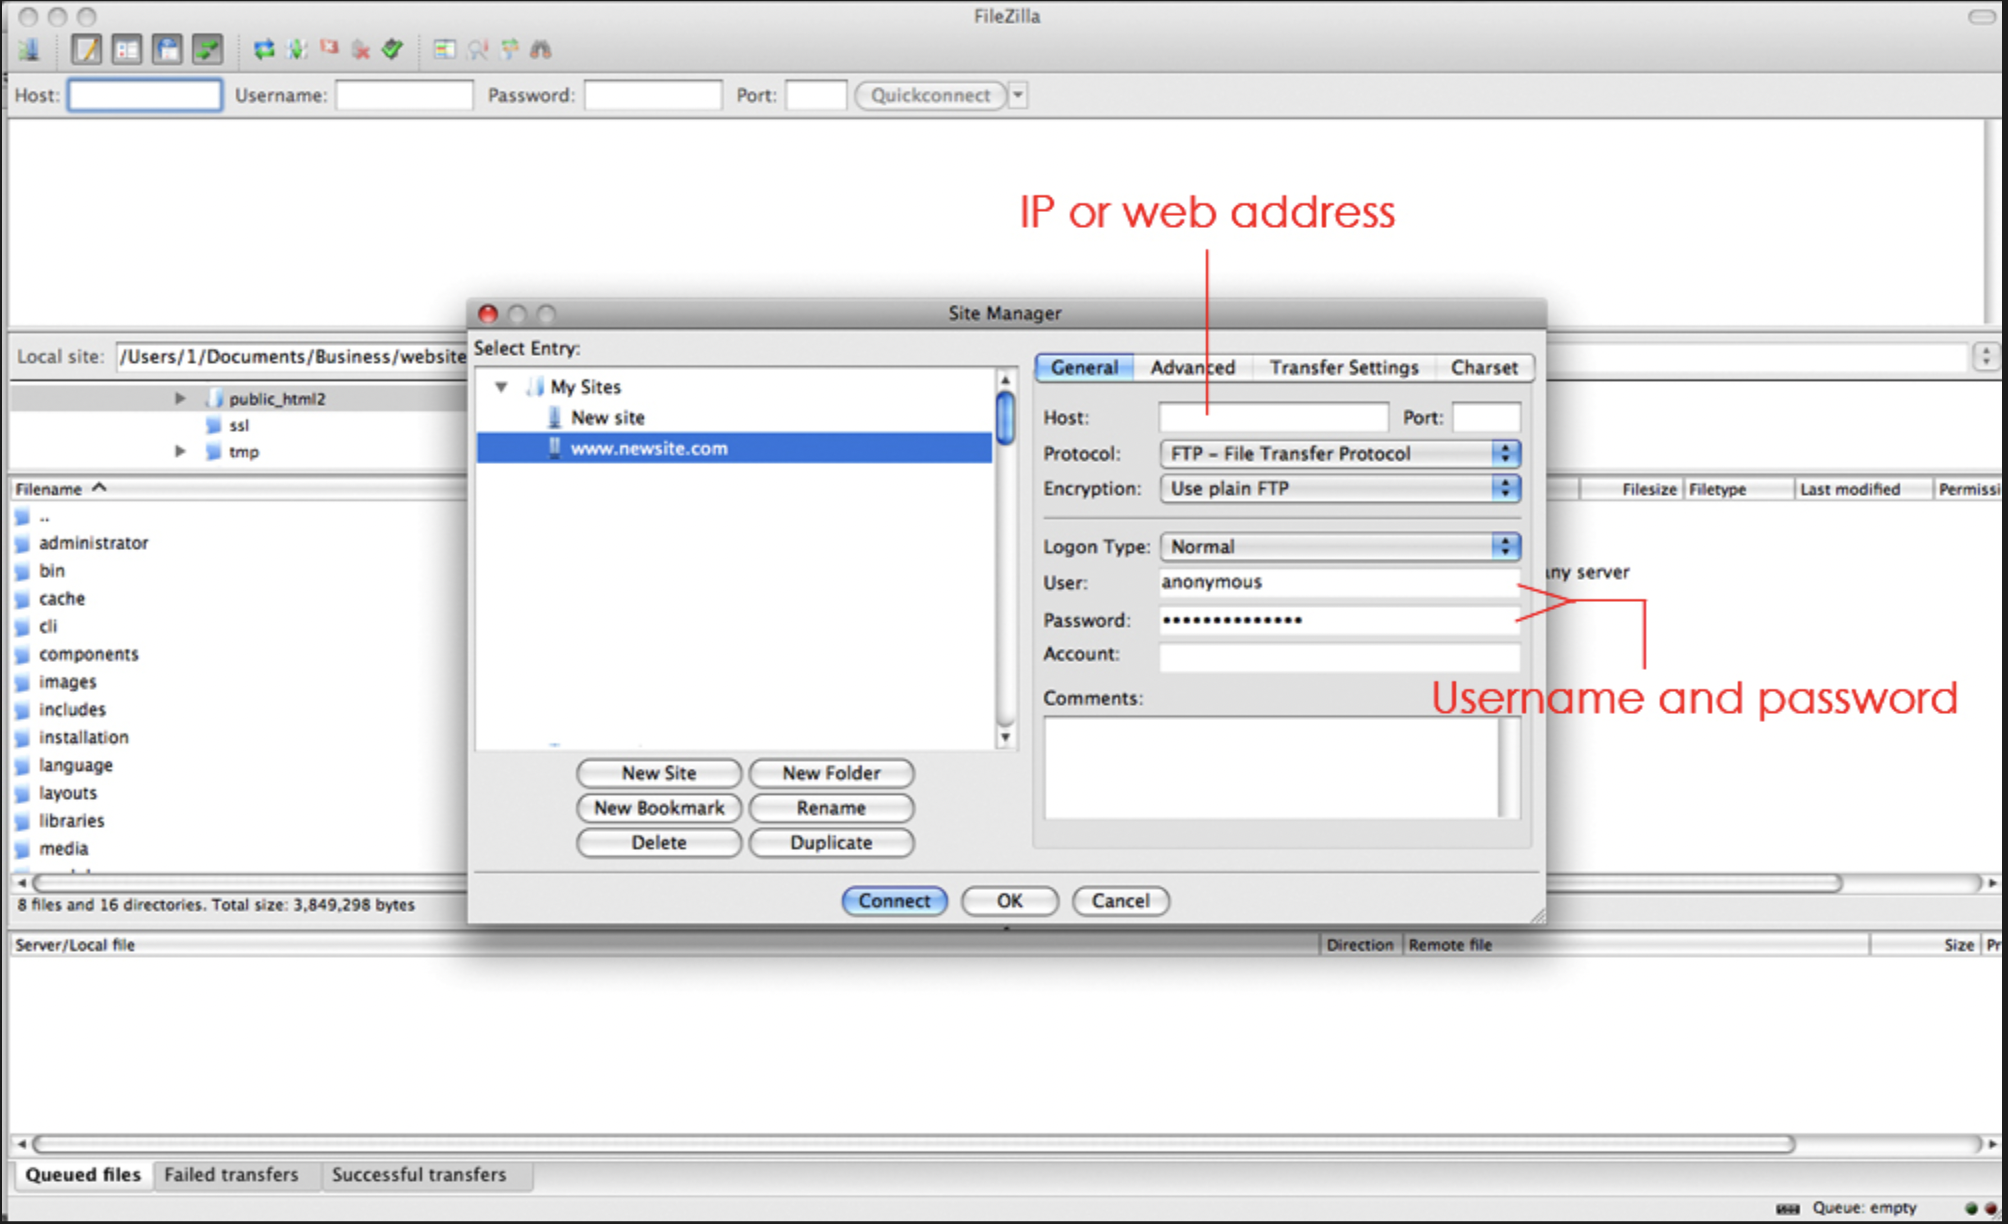
In the above image you can see the login panel in filezilla. All programs that allow FTP access will be similar. You will need the “host” and then the user name and password. ***(Remember to set the “Logon Type” to “Normal”.)***
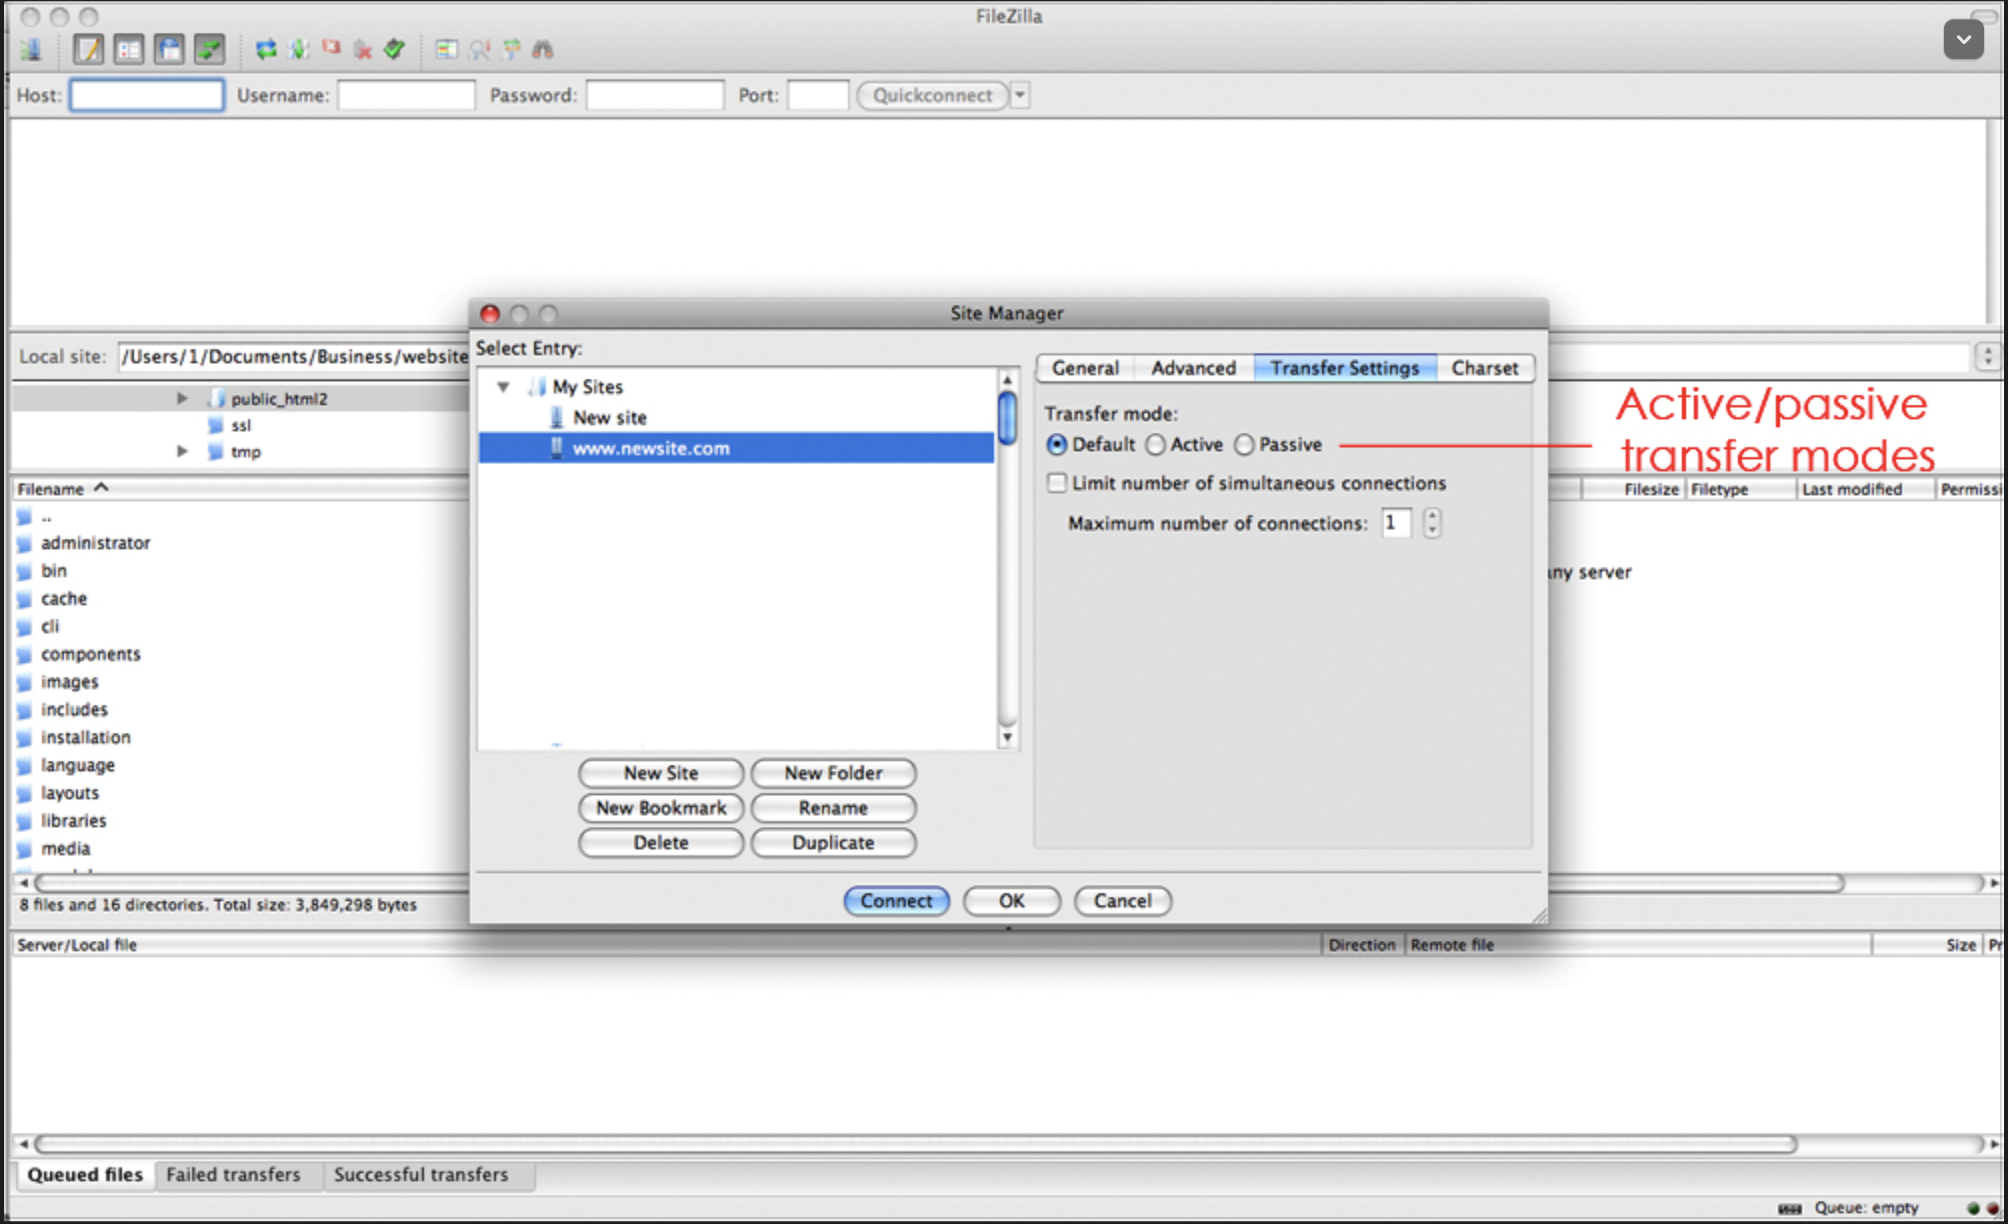
In this image you can see the “transfer mode” Sometimes you might need to switch on active or passive depending on the server. Also, some times even on the same server, sometimes you may need to toggle this from one to another. If you are ever having connection problems and you are certain that you have the right login credentials just remember this.
Once you are logged in. You will immediately see the file system of your server. And, depending on the kind of server you might see different things. If you are logged into the root of the system you will be able to see folders named “www” “usr” “tmp” “public_html” “public_ftp” “mail” “ect” “cache”.
For now all we need to concern this lesson on is the “public_html” folder. This folder on all linux based servers is where all the content on our server will go. So anytime you are uploading anything to your server it will always be going in here.
Make sure you keep the file system on your local machine the same as your server. This will keep things clean.
In filezilla, you will see the left and right sides of the programs window. The left represents the files located on your local computer. The right represents the files located on your server. From here you can upload and download files as you need to by clicking a file or highlighting multiple files and right clicking, then selecting up or download.
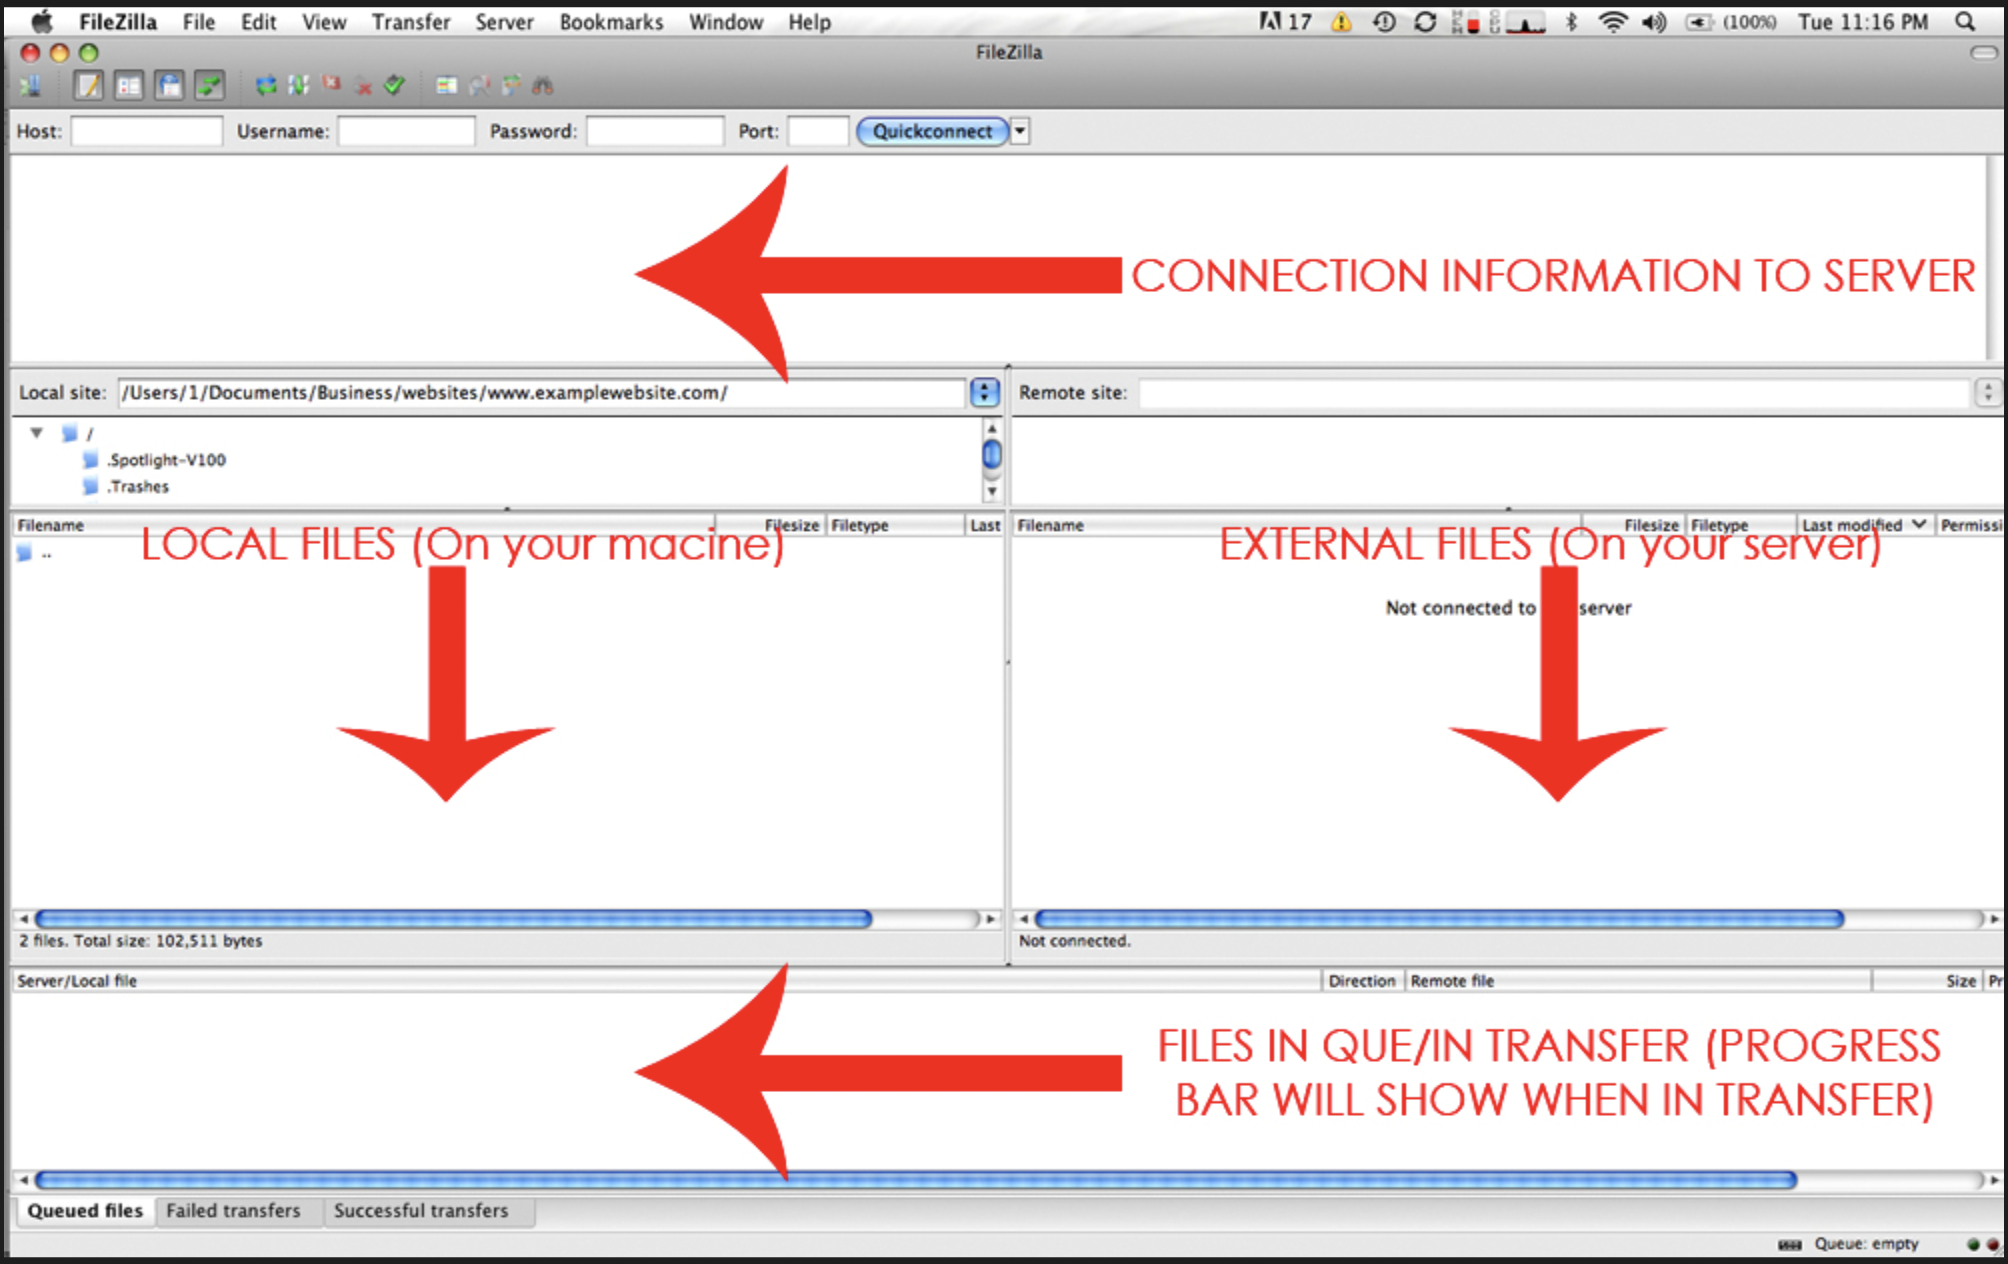
Filezilla is great for uploading or downloading multiple files. Later in your career you may have to upload 100’s or 1000’s or even more files to servers. Programs like this are good for this task. The downside is that in filezilla you cant edit files themselves, this is strictly an FTP program used to upload and download.
Dreamweaver, as it is great for editing files, is not the best choice for uploading and downloading many files in one sitting. It is more geared for editing a file and uploading the single file. so keep this in mind.
Connecting in dreamweaver works the same way. In dreamweaver go to site>new site>
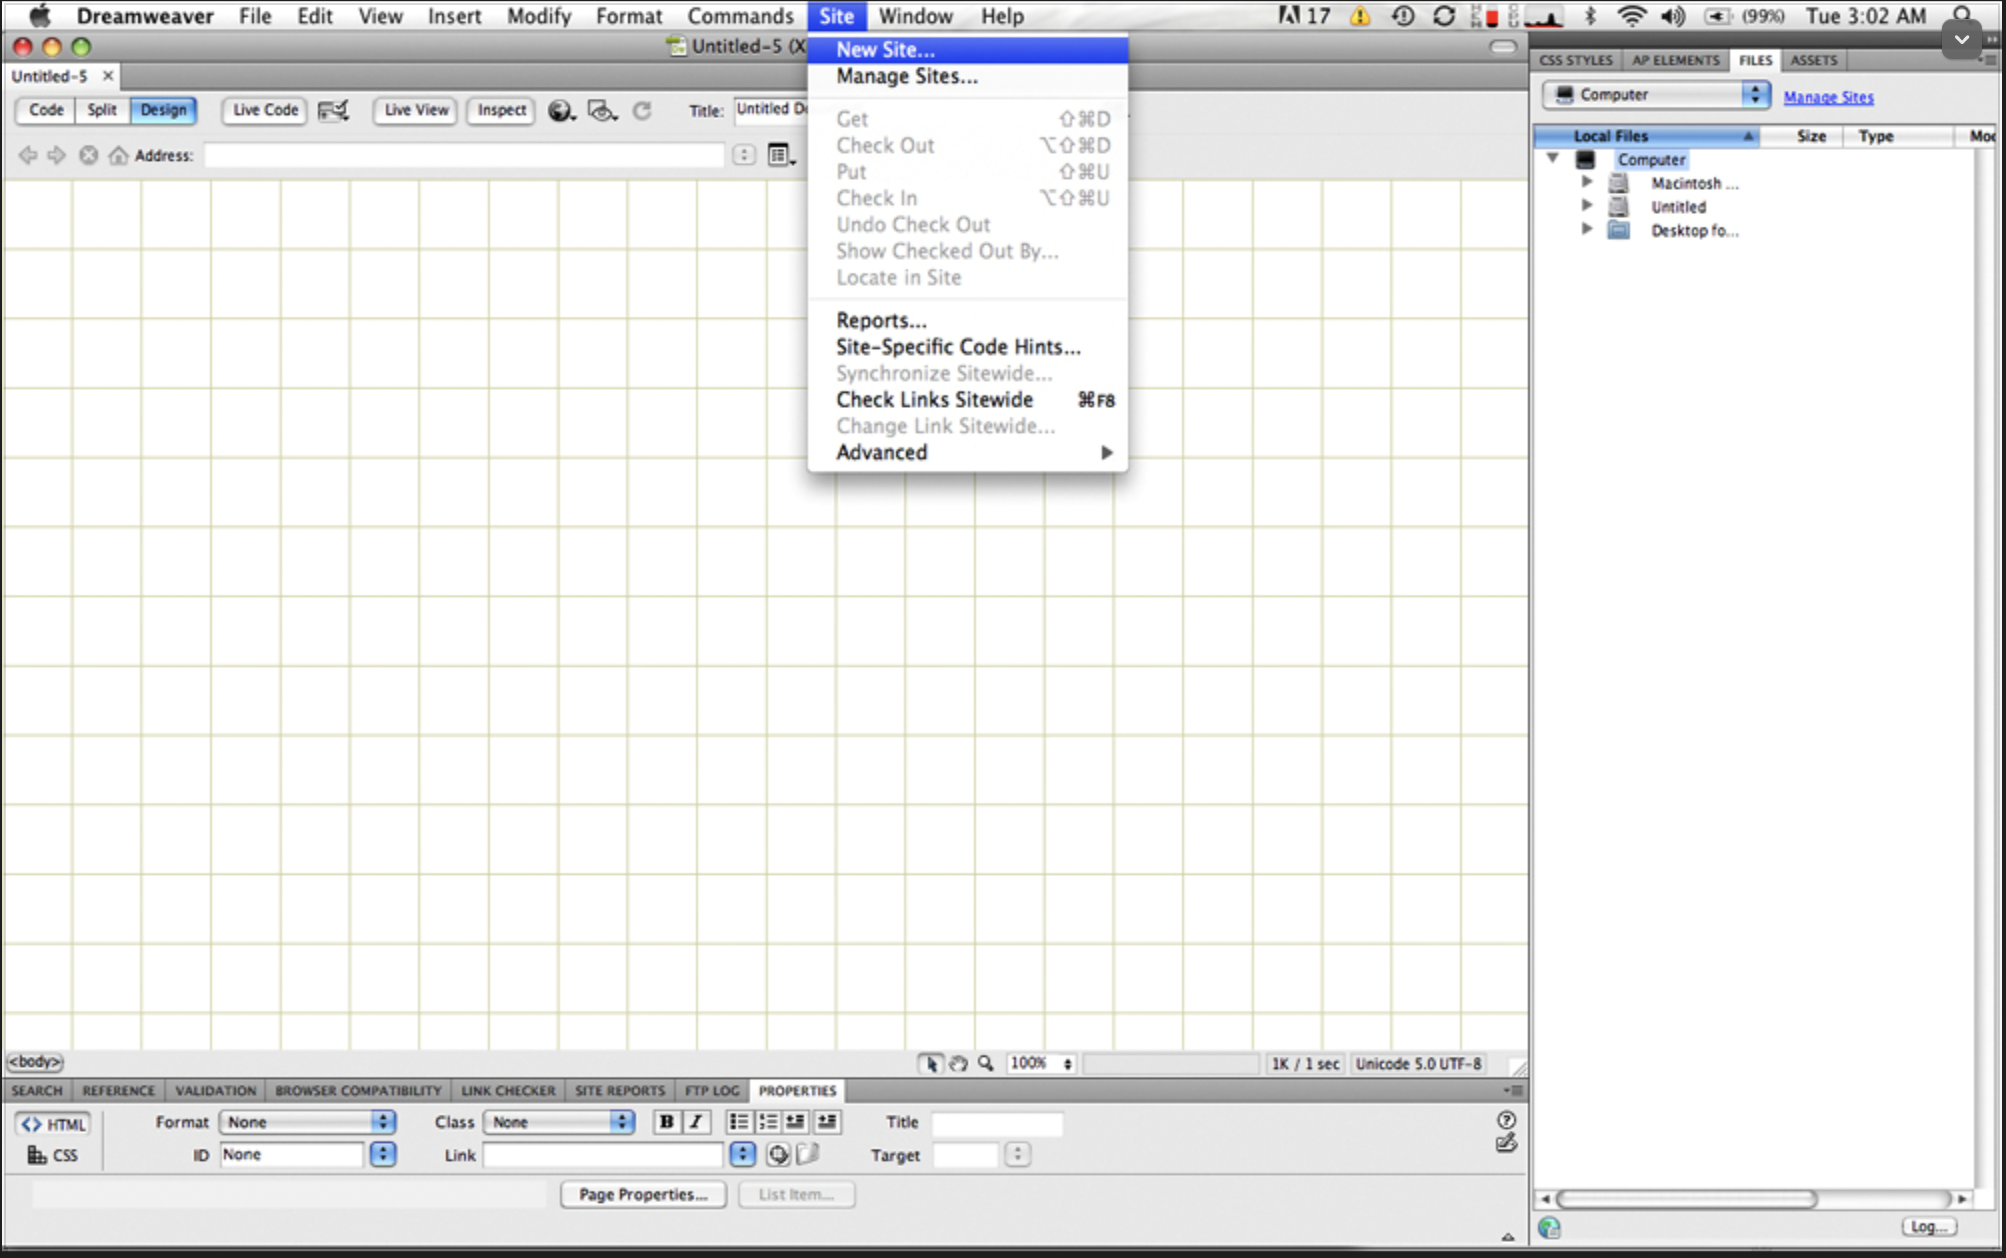
At this point the site setup will pop up.

Here you will type the name of the site and select the local folder containing the files for the site.
Now click servers and click the + button.
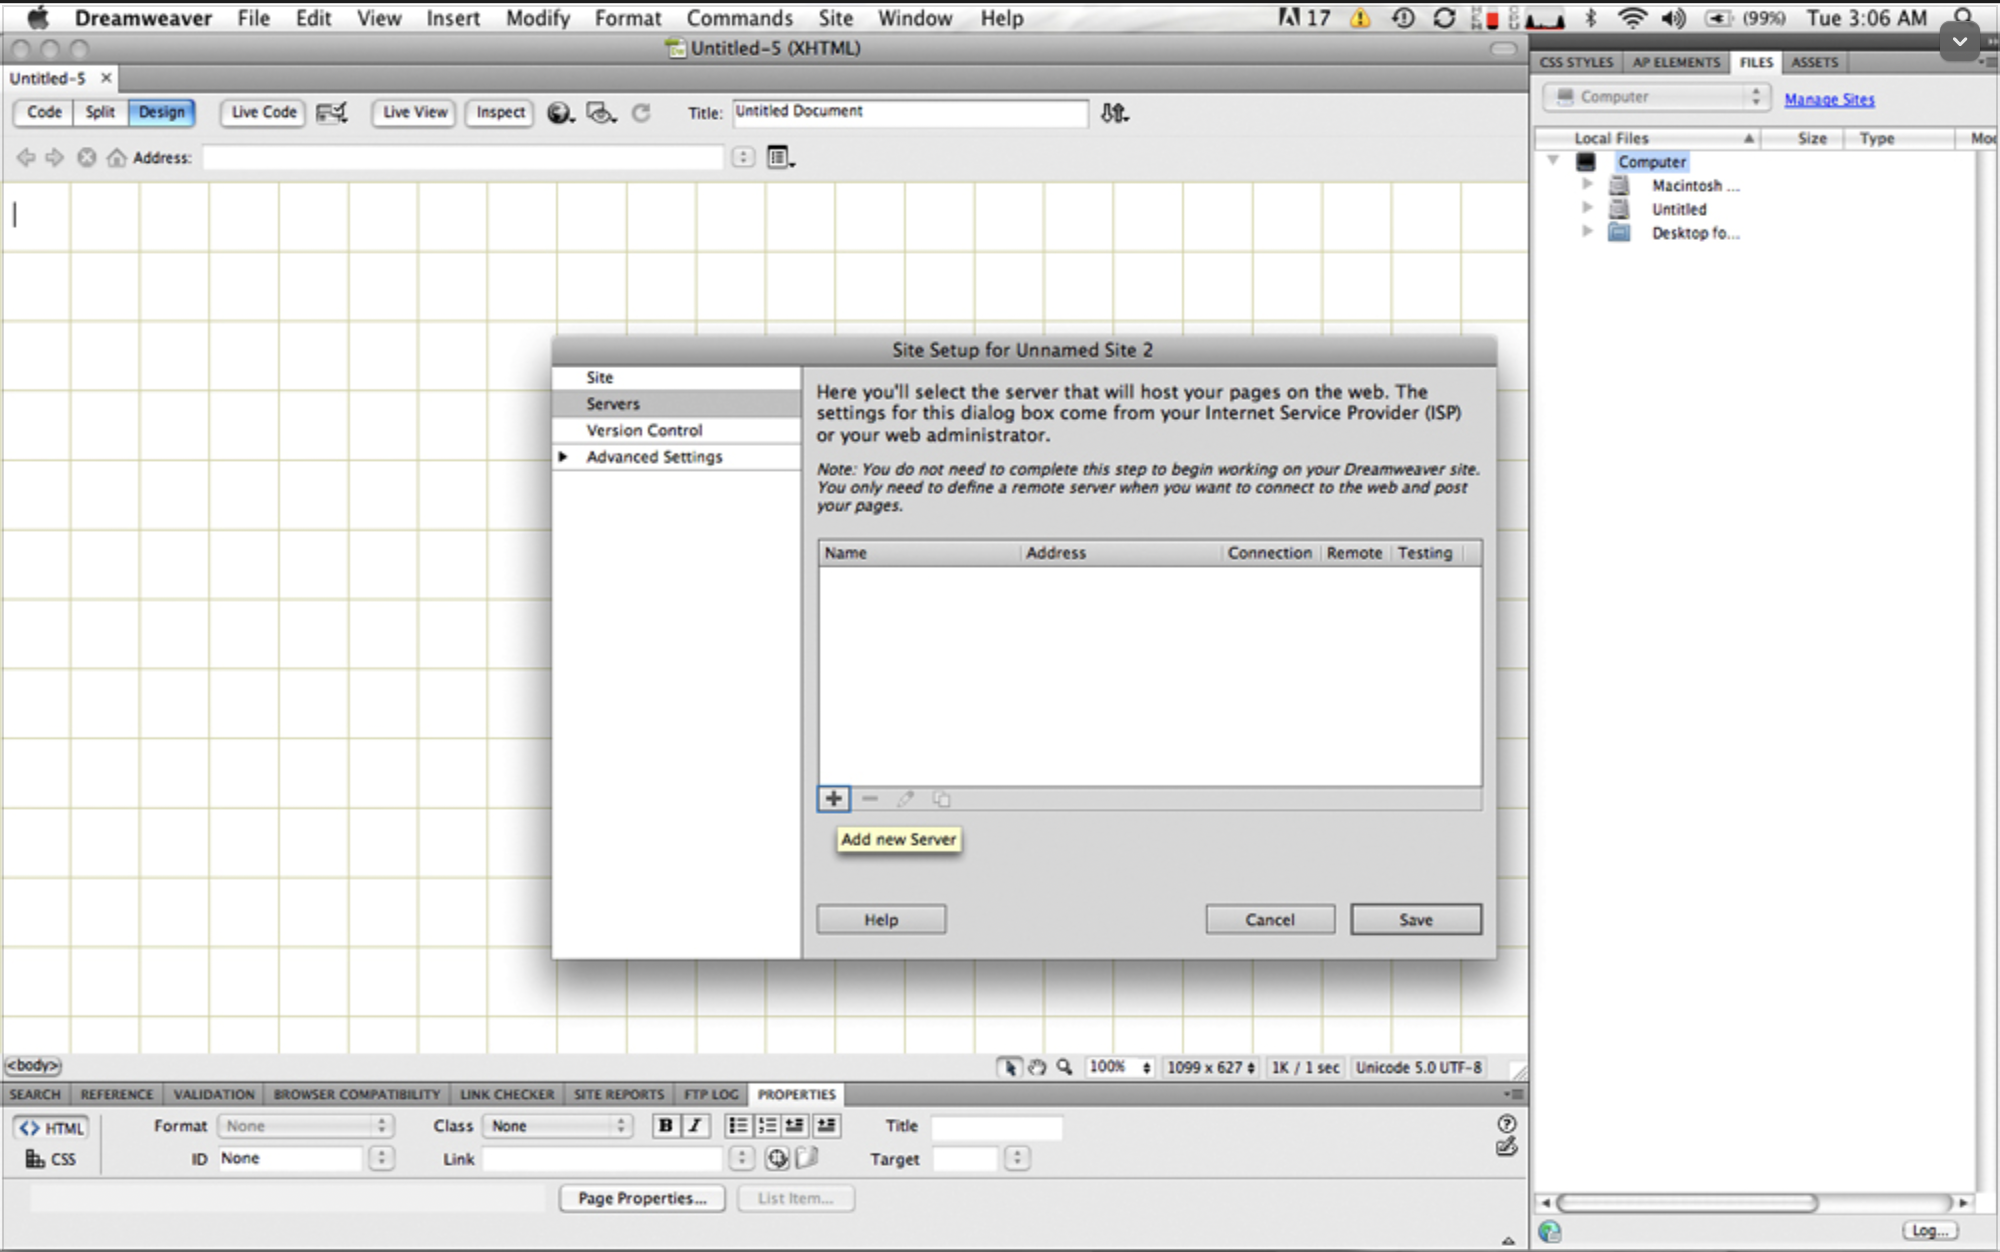
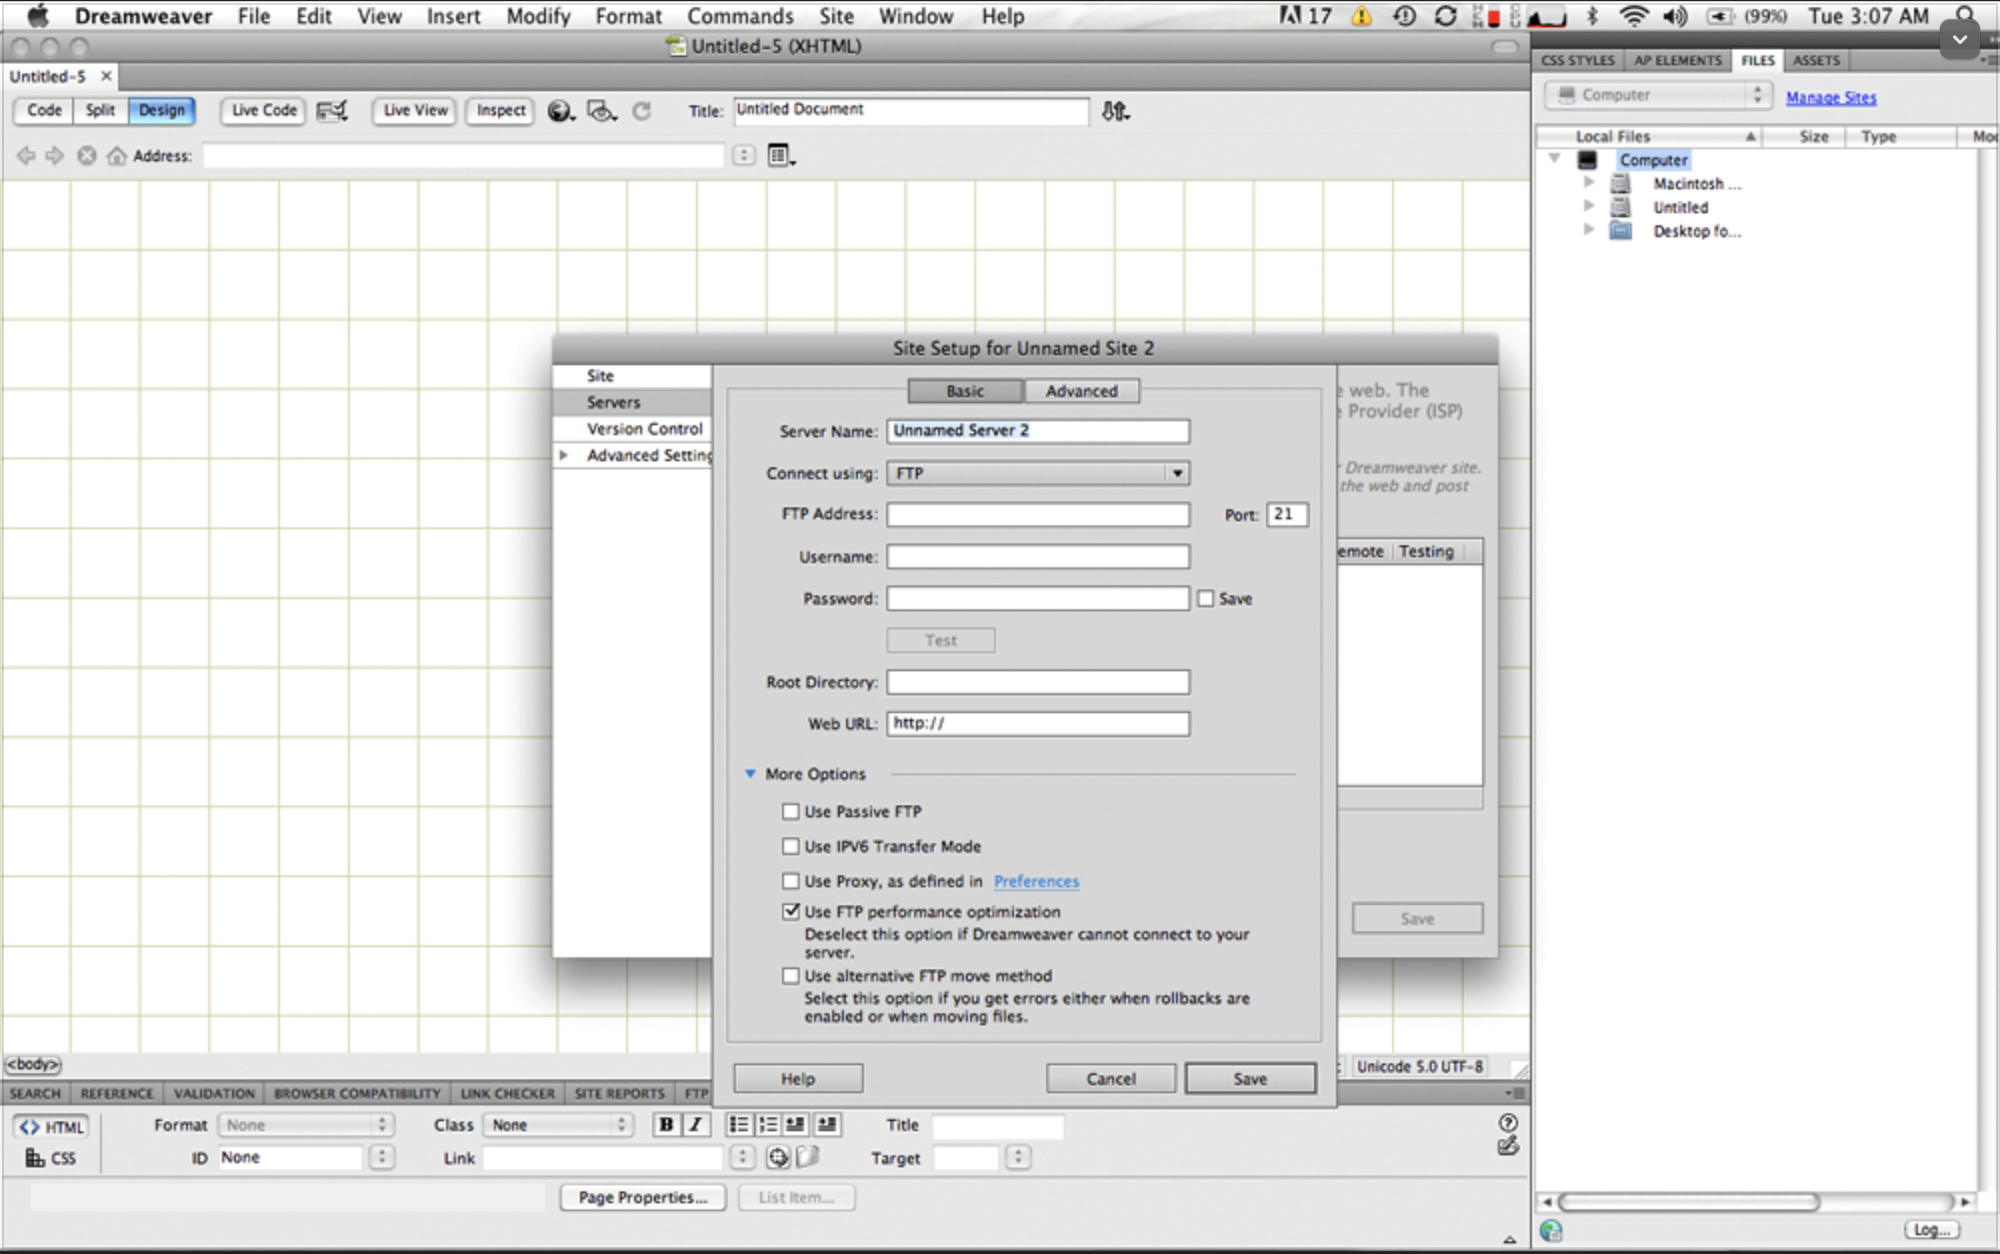
Here we can input the same login info credentials as we did in Filezilla. In the “FTP Address” we can use the IP or the URL.
Once the info is in there hit test to see if everything is working proper.

Remember how sometimes we might have to toggle passive transfer mode? If you need to do this just click the “more options” button and toggle the check box if the server requires it.
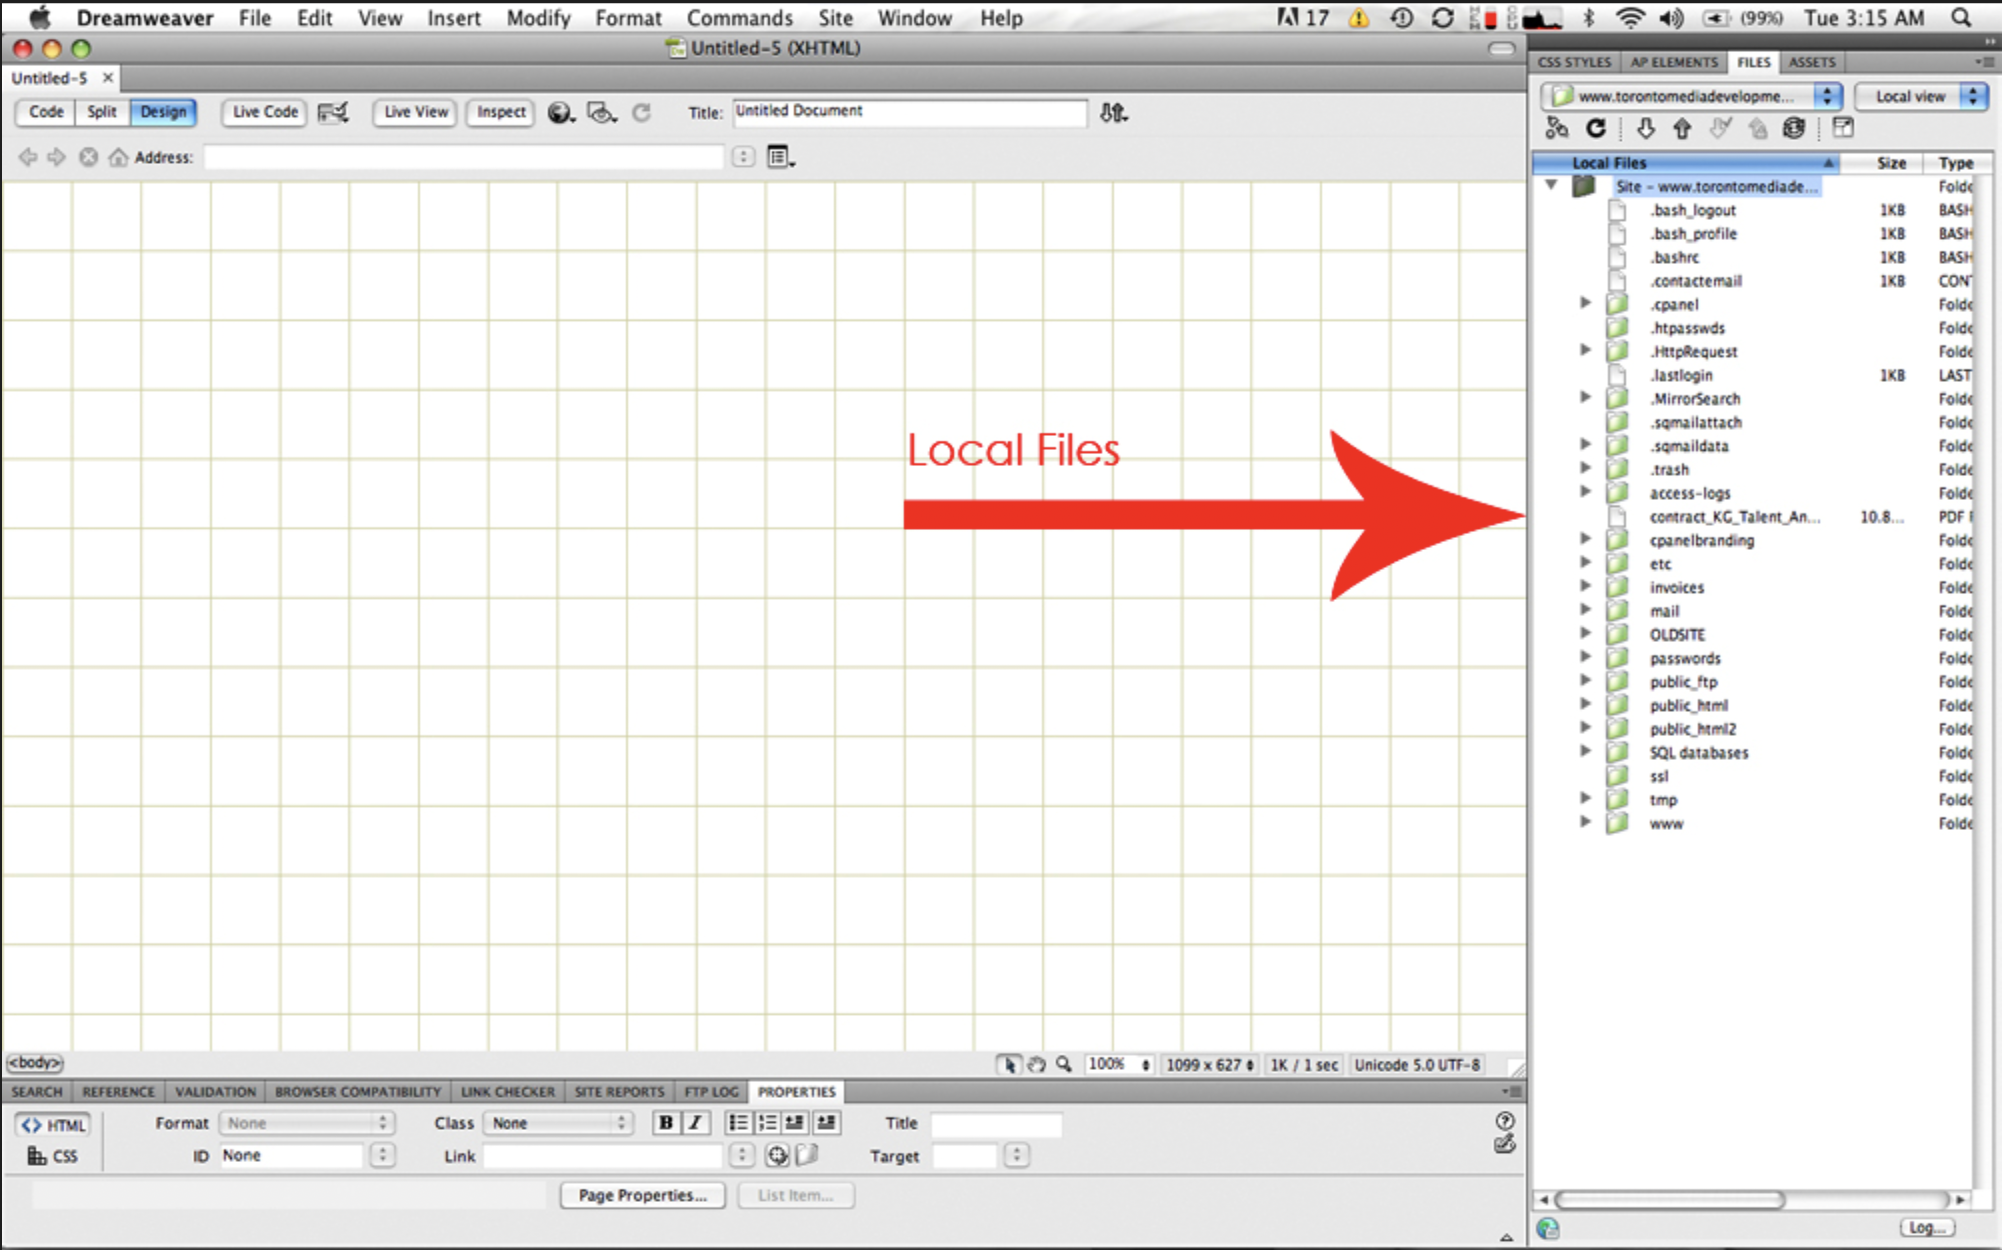
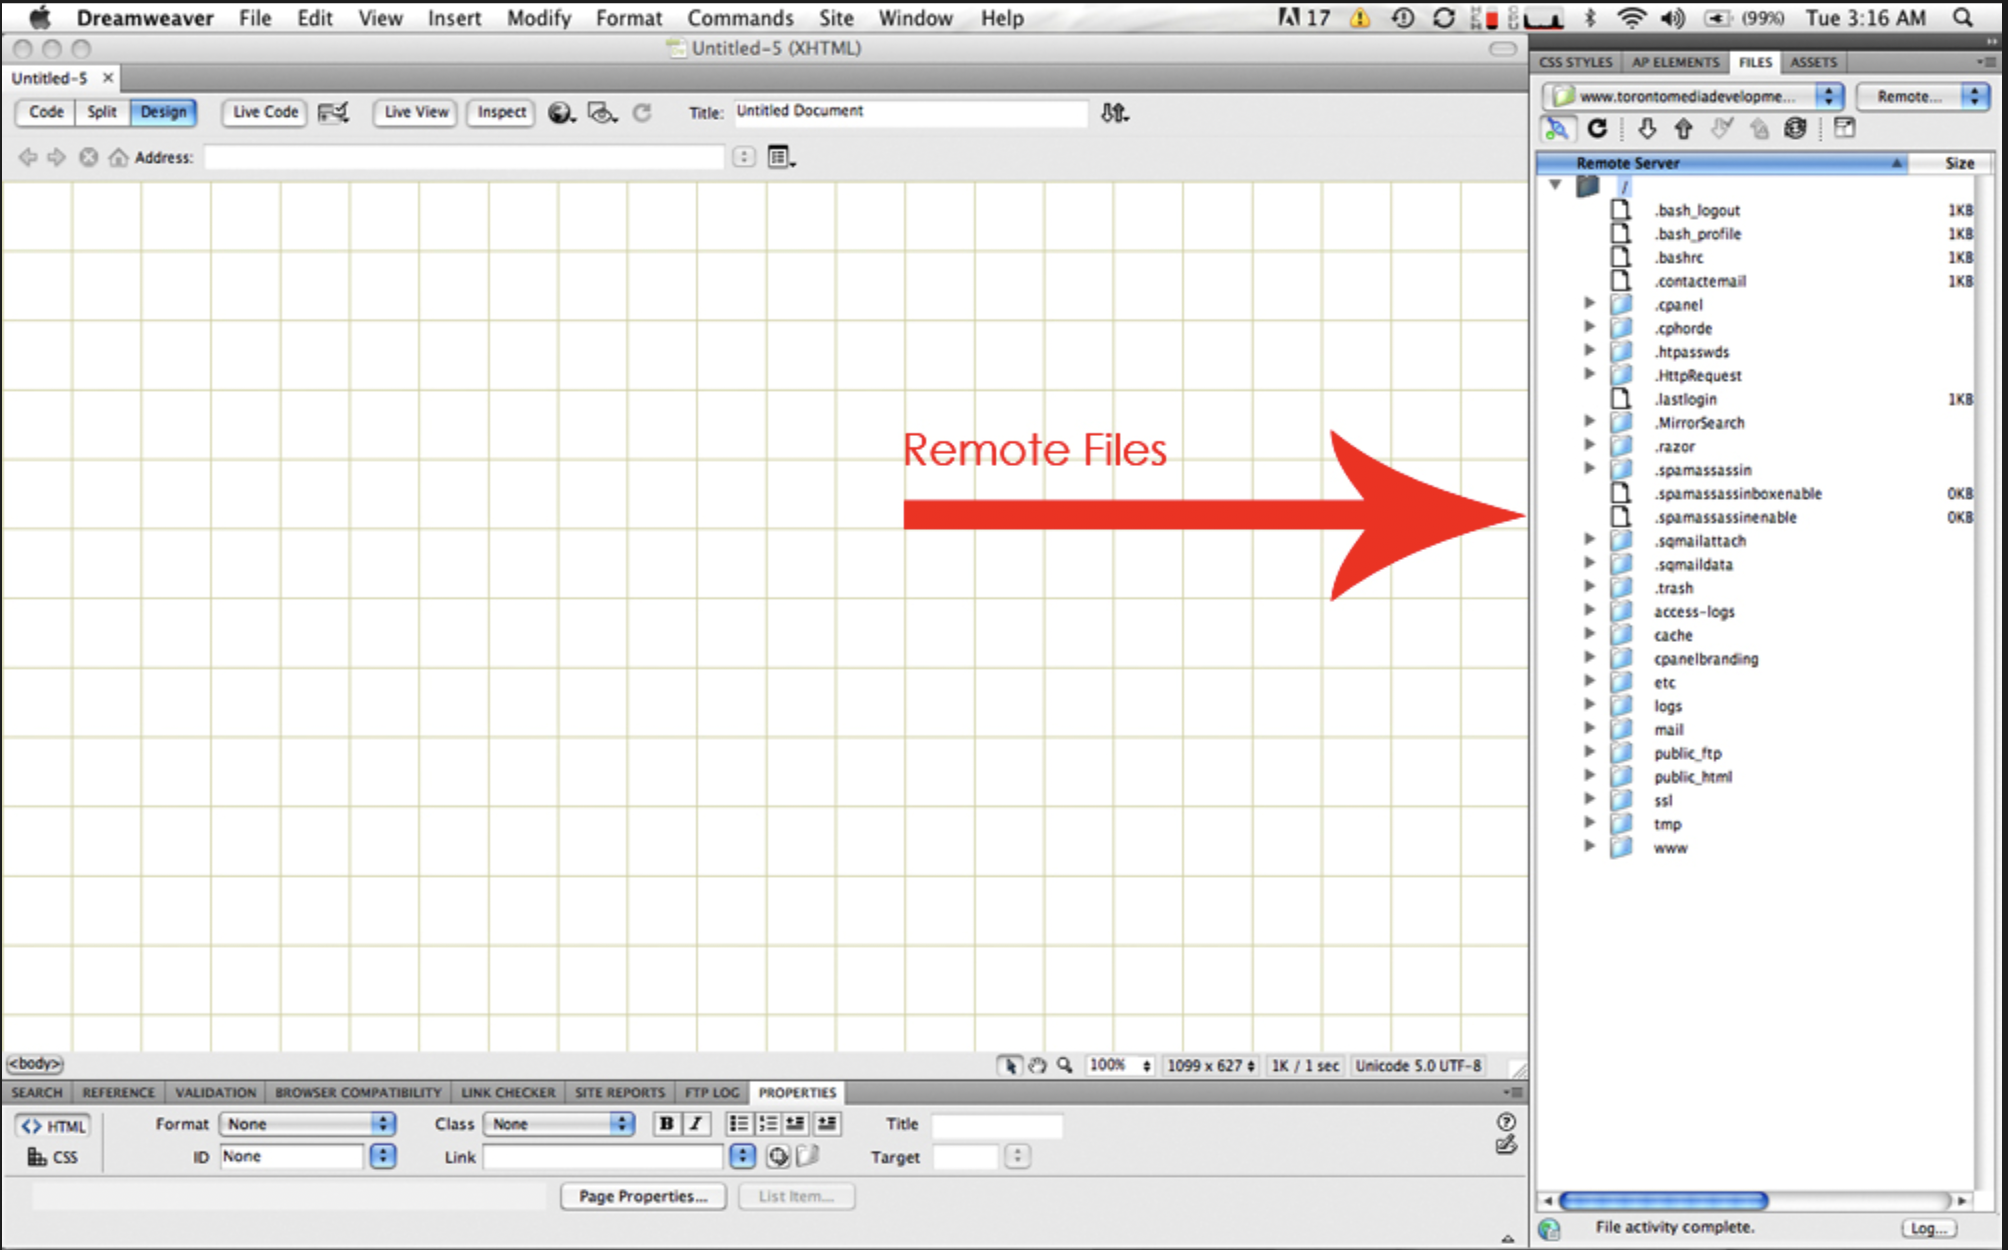
Now that we are logged in we can see our files on the server. In dreamweaver, files are shown on the right side (you can move it around if you like) Local files are green like this:
And remote files on the server are blue like this:
A Closer Look at cPanel
cPanel is a powerful tool for web hosts. It allows you to control many aspects of the back end. You will come across this in your career if you are working with web development and have to work for many clients it is likely that many of them will have this. To access it you will have to navigate to it by going to the link to the section for example: http://yoursite.com/cpanel or by using the port http://yoursite.com:2082 (port 2083 if the site uses SSL).
Lets take a closer look. Head over to:
https://www.hostpapa.com/knowledgebase/cpanel-demo-to-try-before-signing-up/
And click “cPanel Demo”
This is a demo cPanel account. It will allow you to navigate a cPanel environment and see what is under the hood.
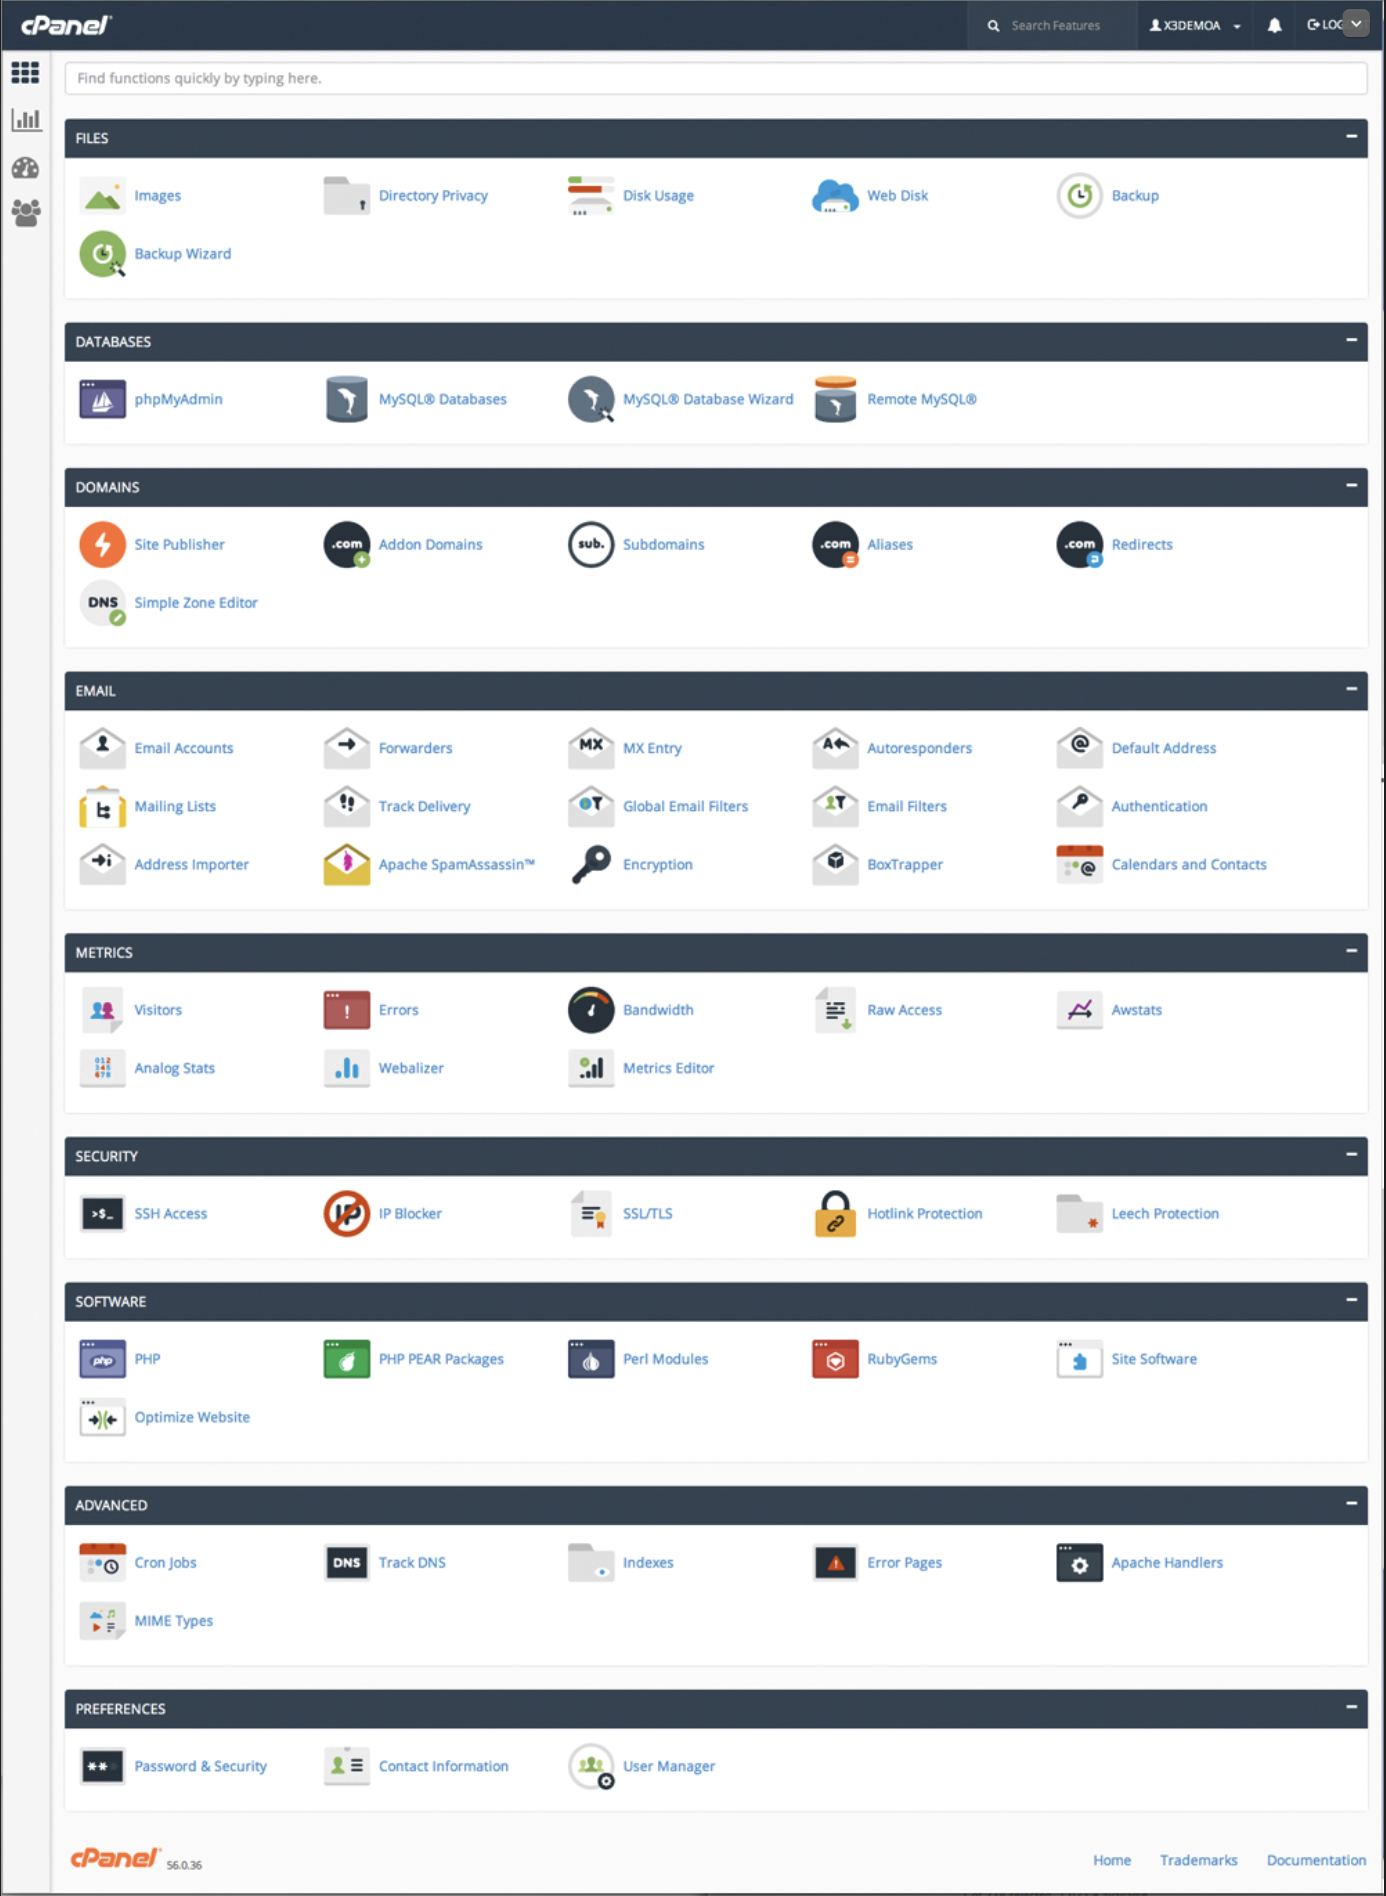
Files:
Here you can view various files on the hosting account, resize images, manage directory privacy/password protect directories, check disk usage manage back ups and more.
Databases:
Here you can create databases, create database user accounts (used as a user for the database(s) that you give them access to as well as set the permissions for said user account. You can also launch PhpMyAdmin where you can view the actual databases that are on the hosting account and the contents within.
Domains:
Here you can view various aspects of the domain(s) with the account. There is also a site publisher which allows you to launch a quick and simple website. You can also create sub domains, aliases and more.
Email:
Here you can manage, create and alter existing email accounts if the email server is managed locally. You can create forwarders, auto responders and mailing lists to name a few features. You can also use Spam Assassin to block spam emails by changing the settings to be more strict.
Metrics:
Here you can track stats on the hosting account and traffic for the site. In the stats for the traffic you can see detailed information on who is coming to your site, how they are getting there, what country they are from and more. This is a powerful tool when managing a site and analyzing the traffic, SEO and things of that nature.
Security:
Here you can grant or restrict SSH access (Secure Shell which allows users to connect to the command line linux). Set up SSL and more.
Software:
Here you can view the PHP configuration and other various softwares running IE pear, pearl, ruby and site software. Depending on the hosting there may be deployable CMS systems in there like wordpress that can be easily deployed.
Advanced:
Here you can manage more advanced aspects of the server like apache handlers, cron jobs, error pages and more.
Preferences:
Where you can change the password, contact info and manage users
Examples of Hosting Providers
Traditional Paid Hosting
These are going to be the best to learn on and easiest to use. They will offer support 24/7 via phone, email and chats. The trade off is that it costs money usually $5.00 or so a month.
godaddy.com
web.com
hostgator.com
bluehost.com
netfirms.ca
a2hosting.com (recommended)
Free Hosting
These are all free. However, they may not have support unless you pay a little money for an upgraded plan. It may be harder to learn on but you will get somewhat of a traditional hosting experience more or less depending on which option you choose to work with. https://www.000webhost.com
https://infinityfree.net/ (recommended) https://www.freehosting.com (must buy domain but hosting is free with CPanel)
GitHub
This is also free however it can be hard to use, if you use it with command line. There is an easy way to use it using the website UI to upload files, directly write files or copy and paste code in. There is still a learning curve. It is good to know how to use GitHub. Typically you should learn how to use both traditional hosting and git hub. The cons of using GitHub is that it is not private at all as everything is stored on GitHub’s servers. I would not host any sensitive data or anything you want private here. https://github.com/
https://pages.github.com/
If you choose to use GitHub you will have to either install git on your computer: https://git-scm.com/ download and install.
Or learn to use the website’s interface (*Easier way). If you choose this way you do not need to install git on your computer. This lecture will cover the easy way.
Next you will need to make an account on GitHub: https:// github.com/
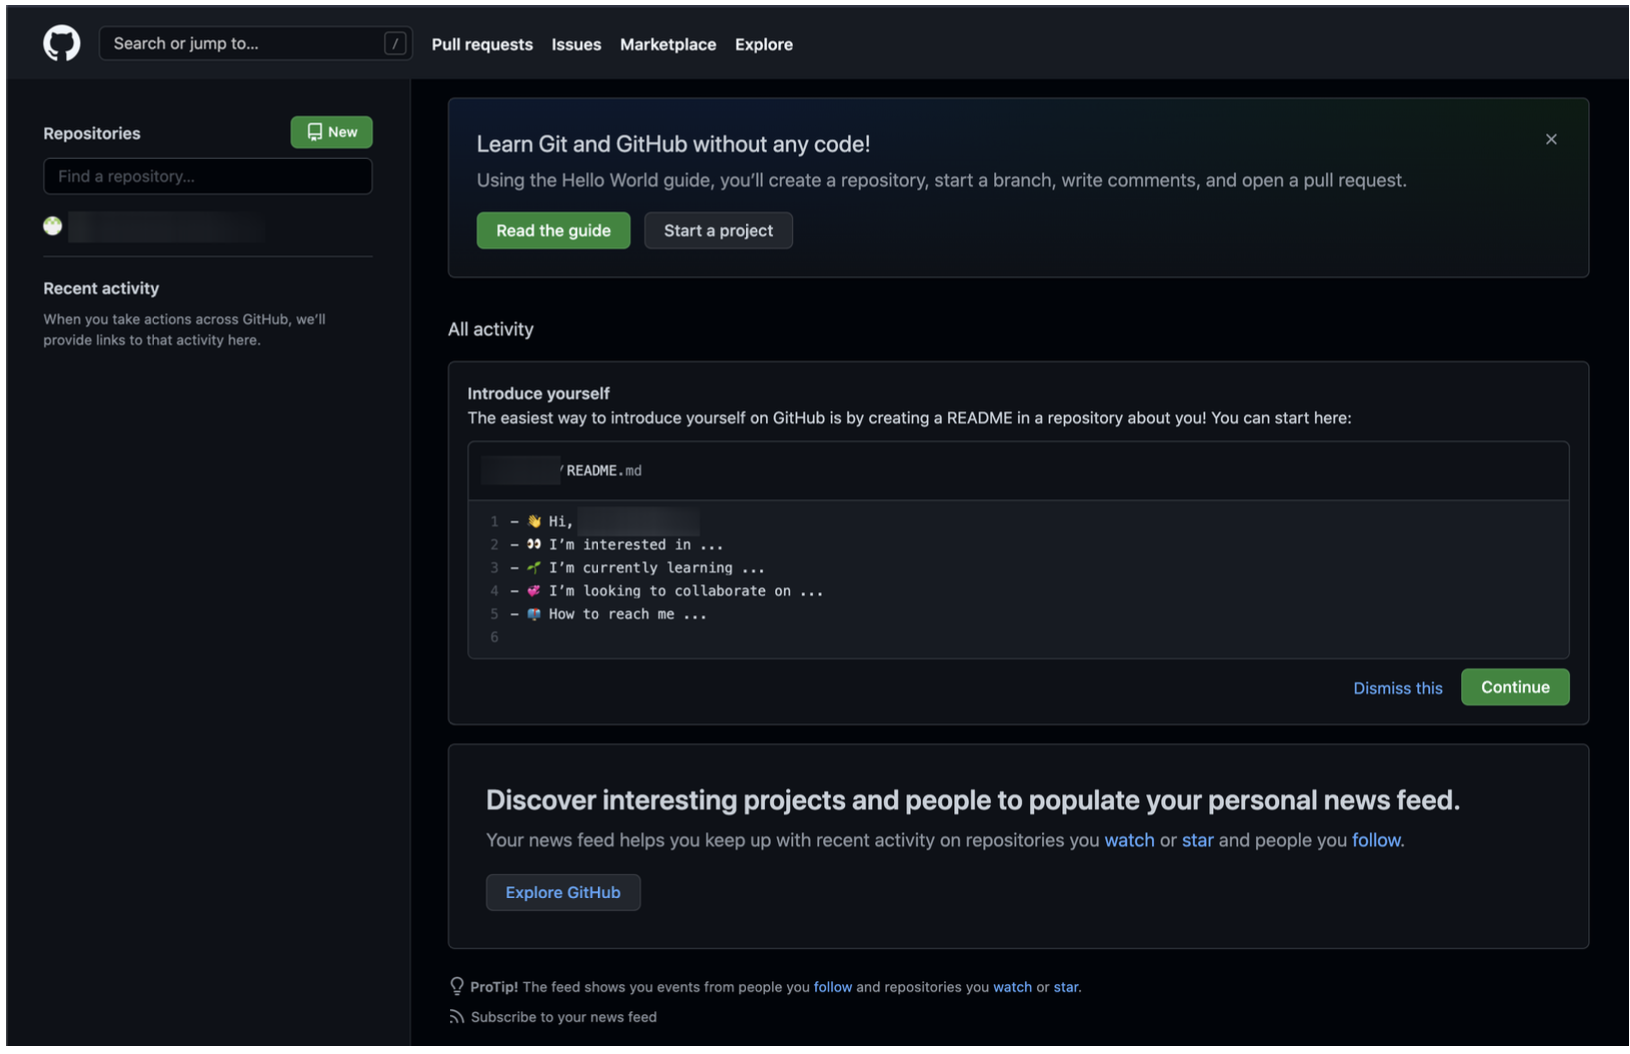
Once you sign in you will see this:
Click “New” beside “Repositories” to make a new repository (A repository is like making a new project folder).
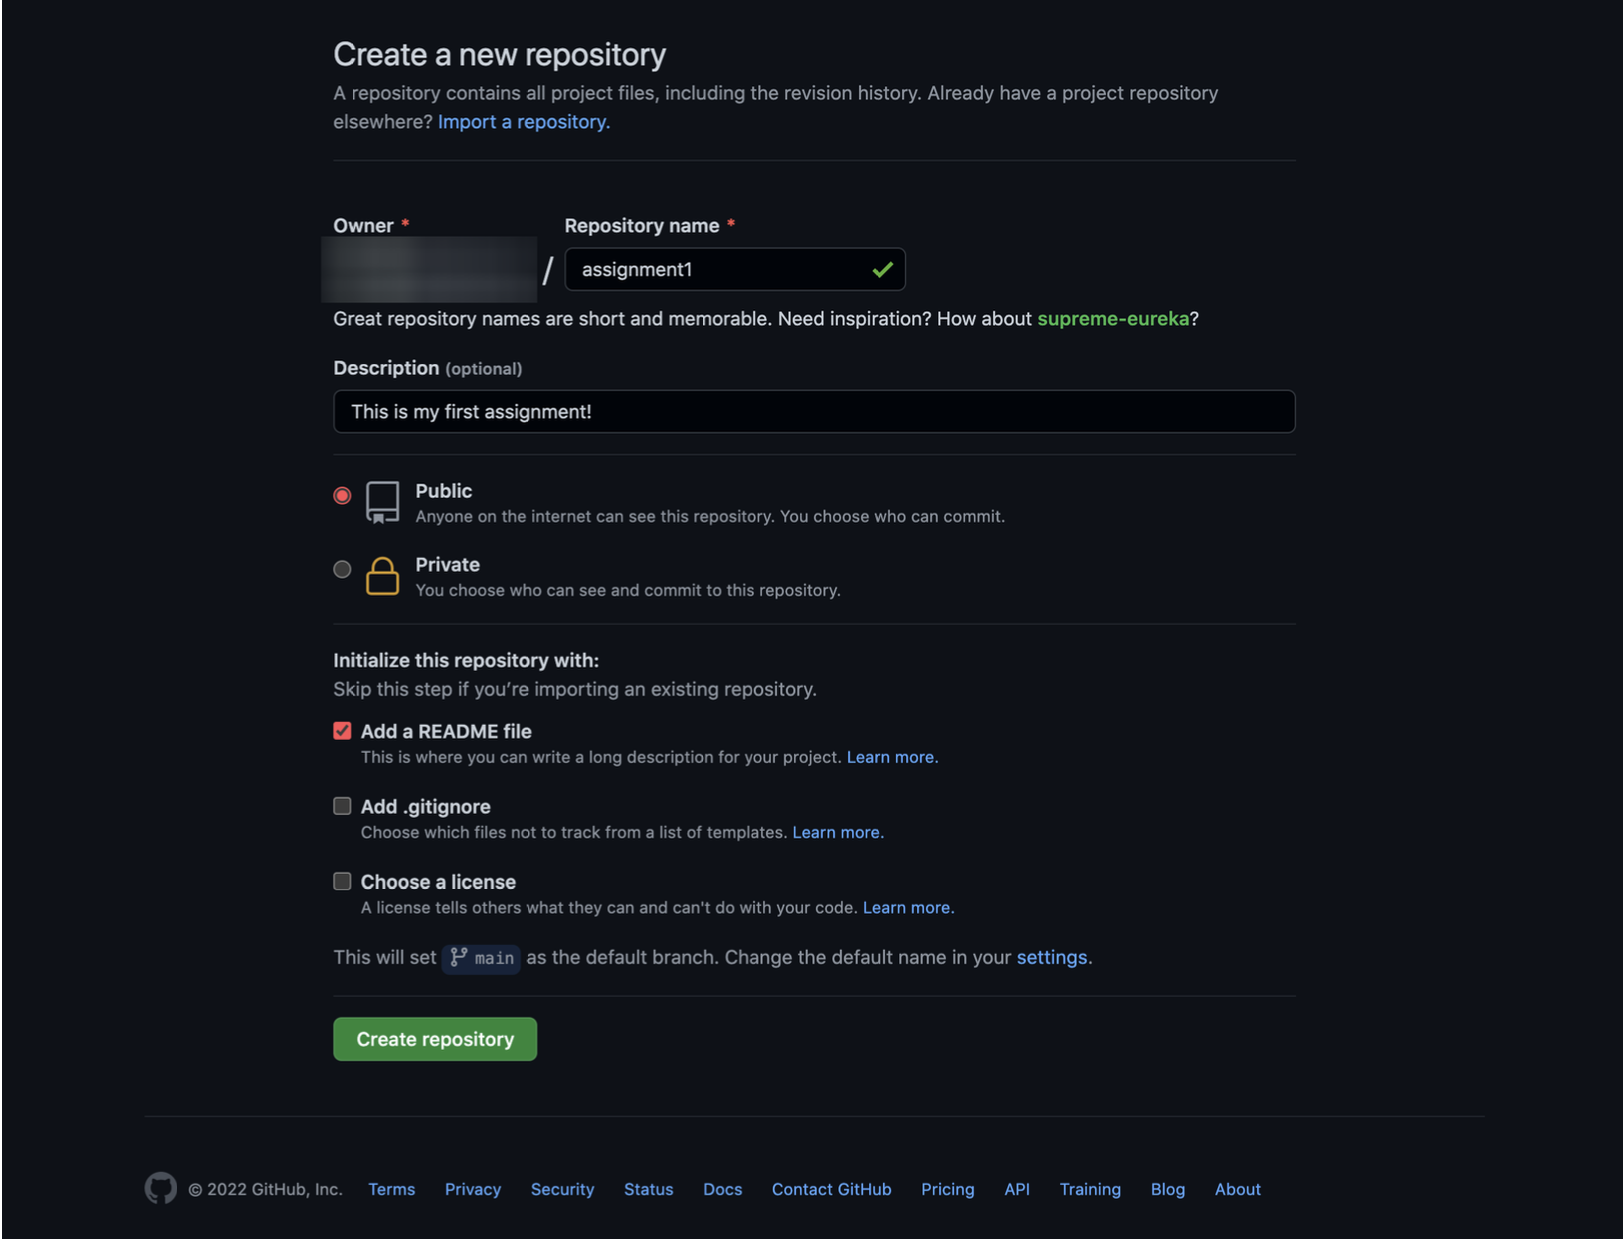
You will see this page where you can name the repository and give an optional description. You can also add an optional readme file. When done press “Create Repository”.
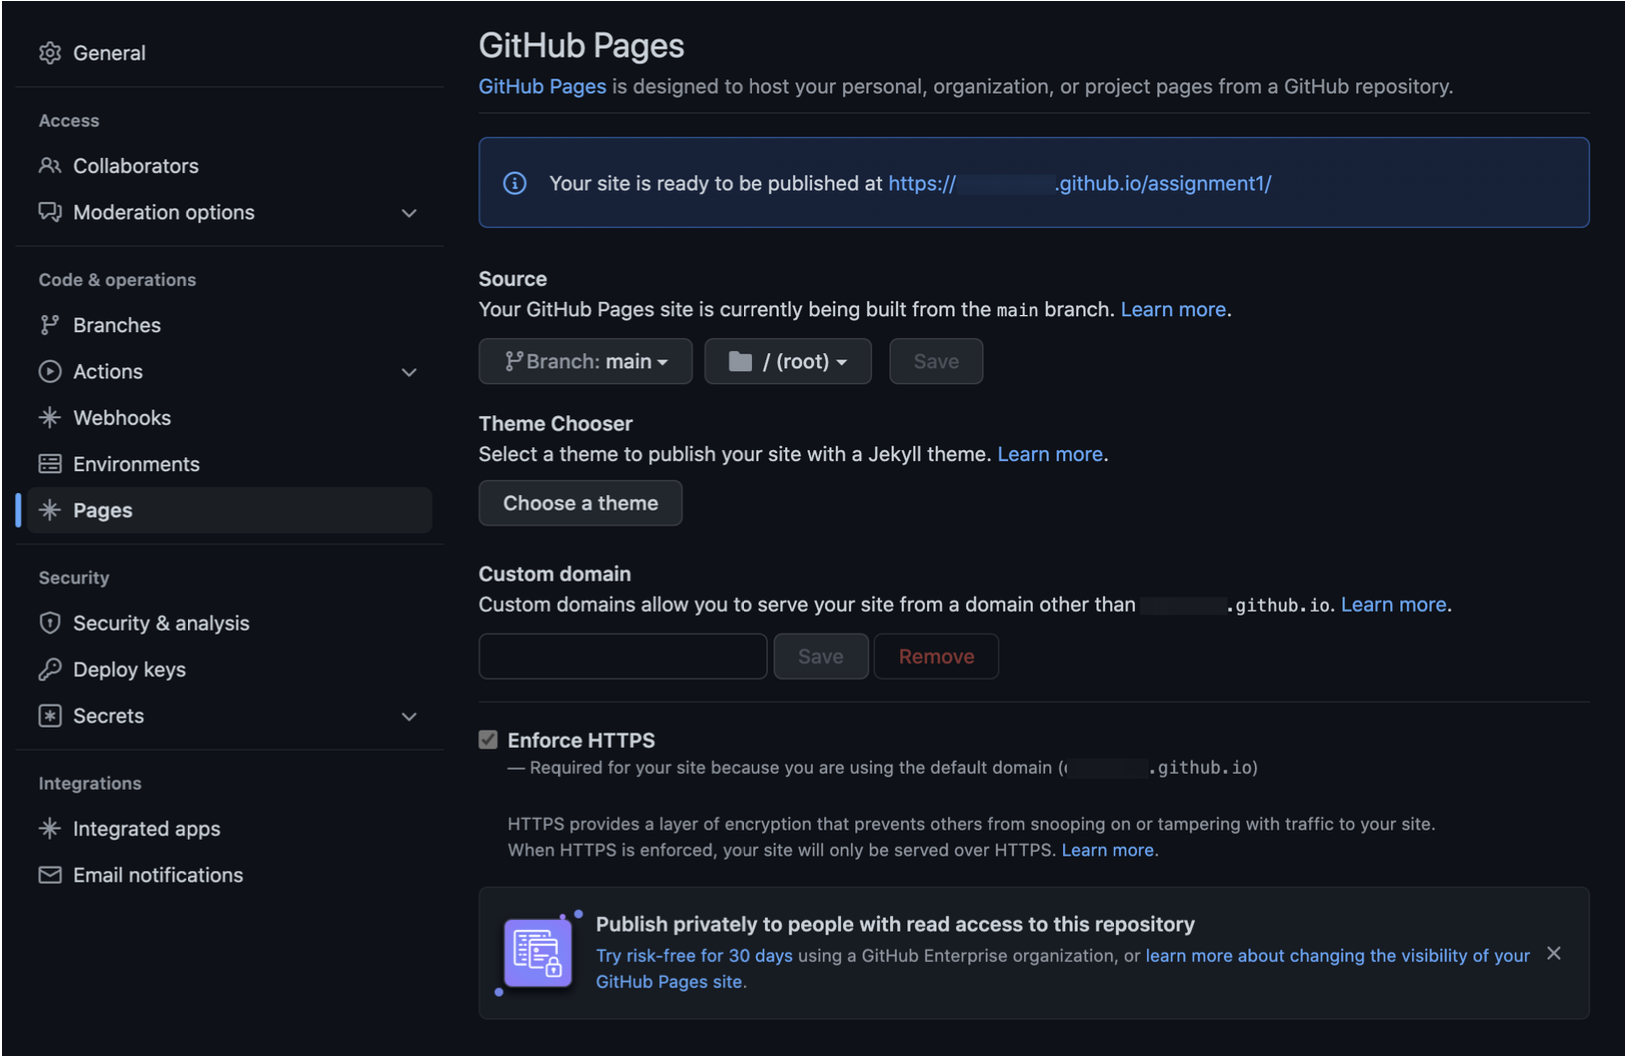
You will now see this page, You will have to turn on Github Pages. To do so click “Settings”.
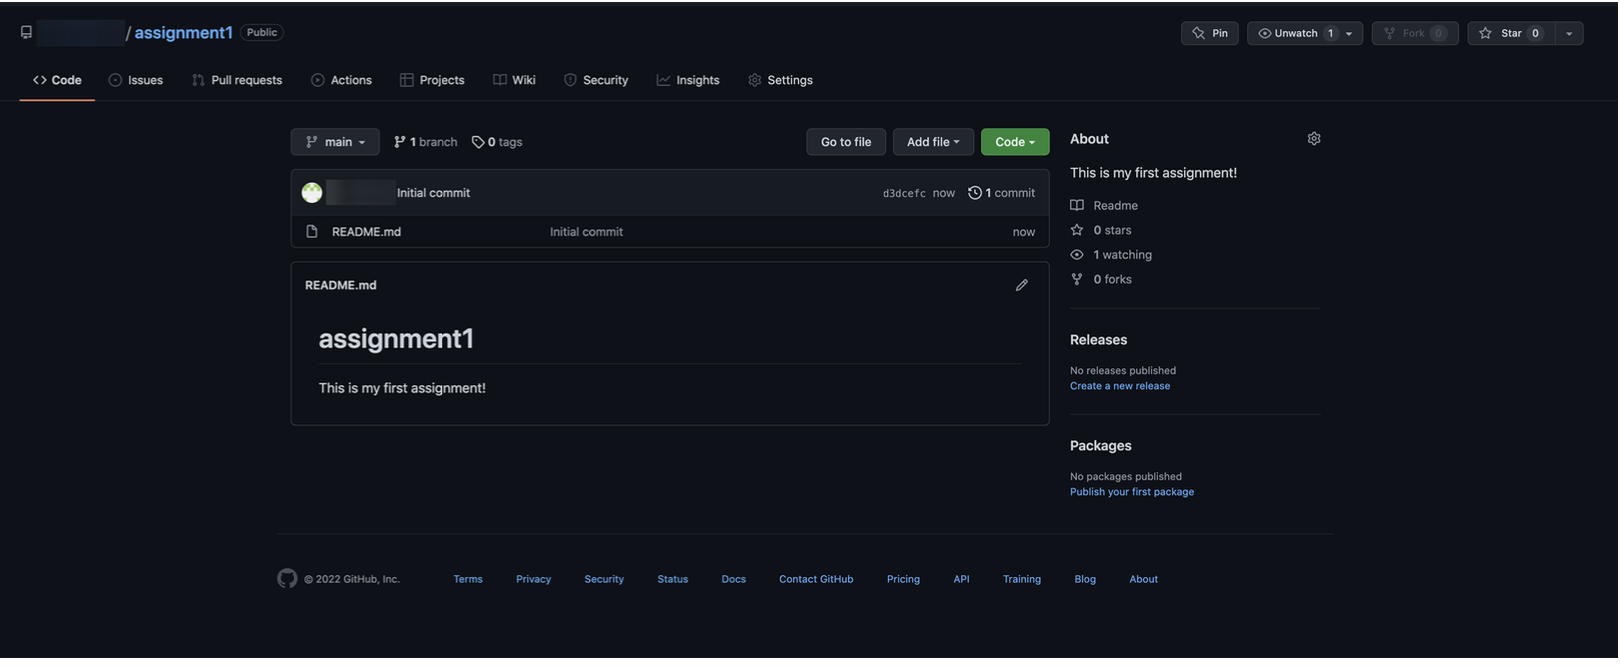
Click “Pages on the side nav and from there, select the source as “main” > root and save it.

At this point, the repository is now available for you to push the files to and be displayed on the web at the URL provided for the repository.
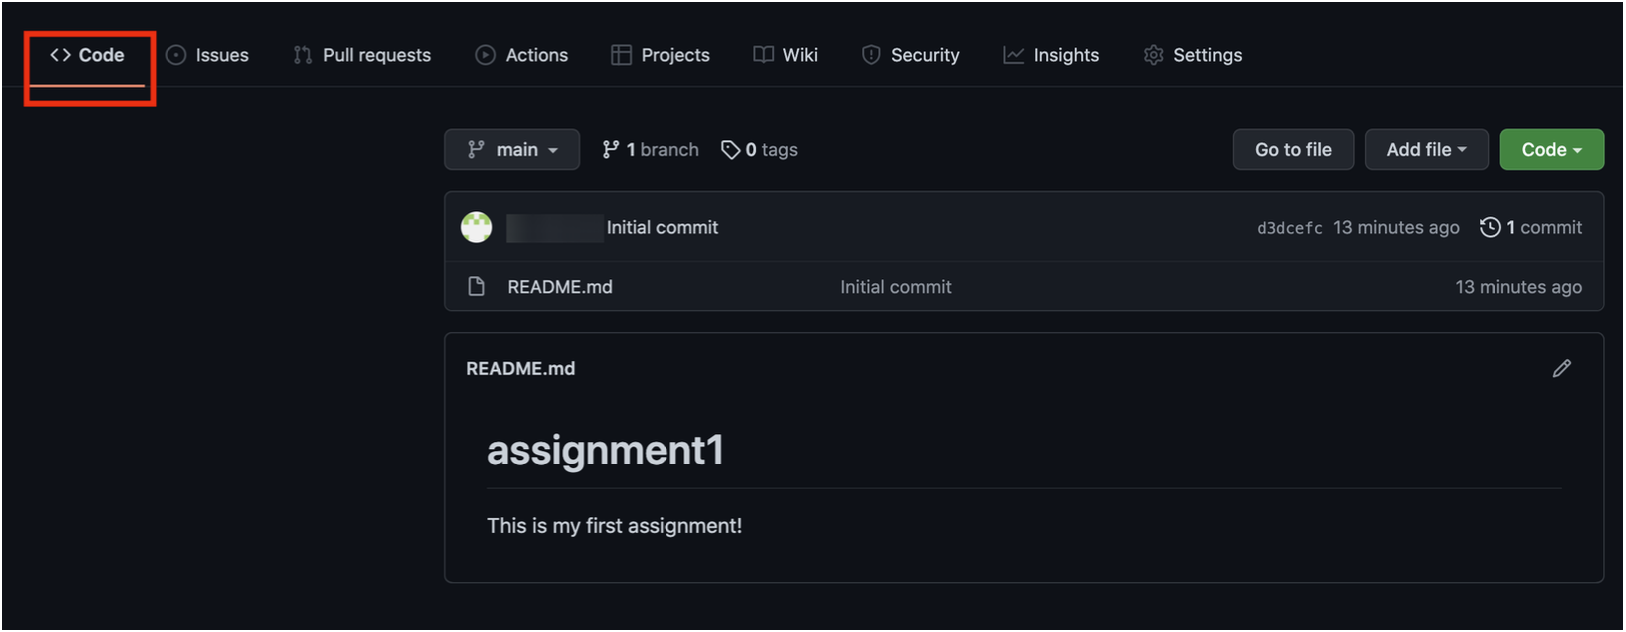
To use GitHub the easy way. Click “Code” Here you can easily upload files to your repository, write code directly in the browser or paste code in.
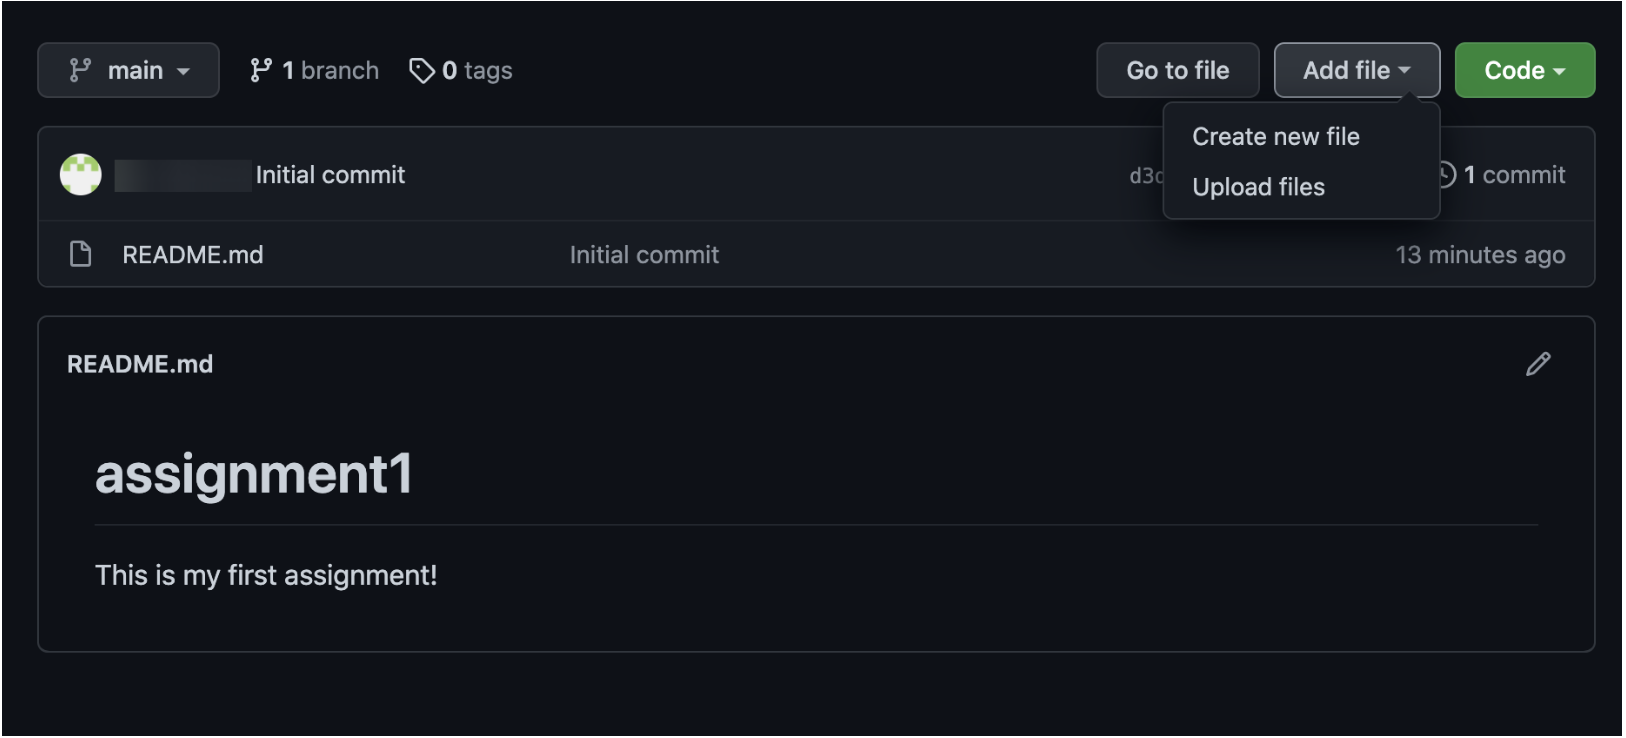
Click “Add File” and either upload or create new file.
Write the code or paste it if you choose to create new file. When done click “Commit New File”.
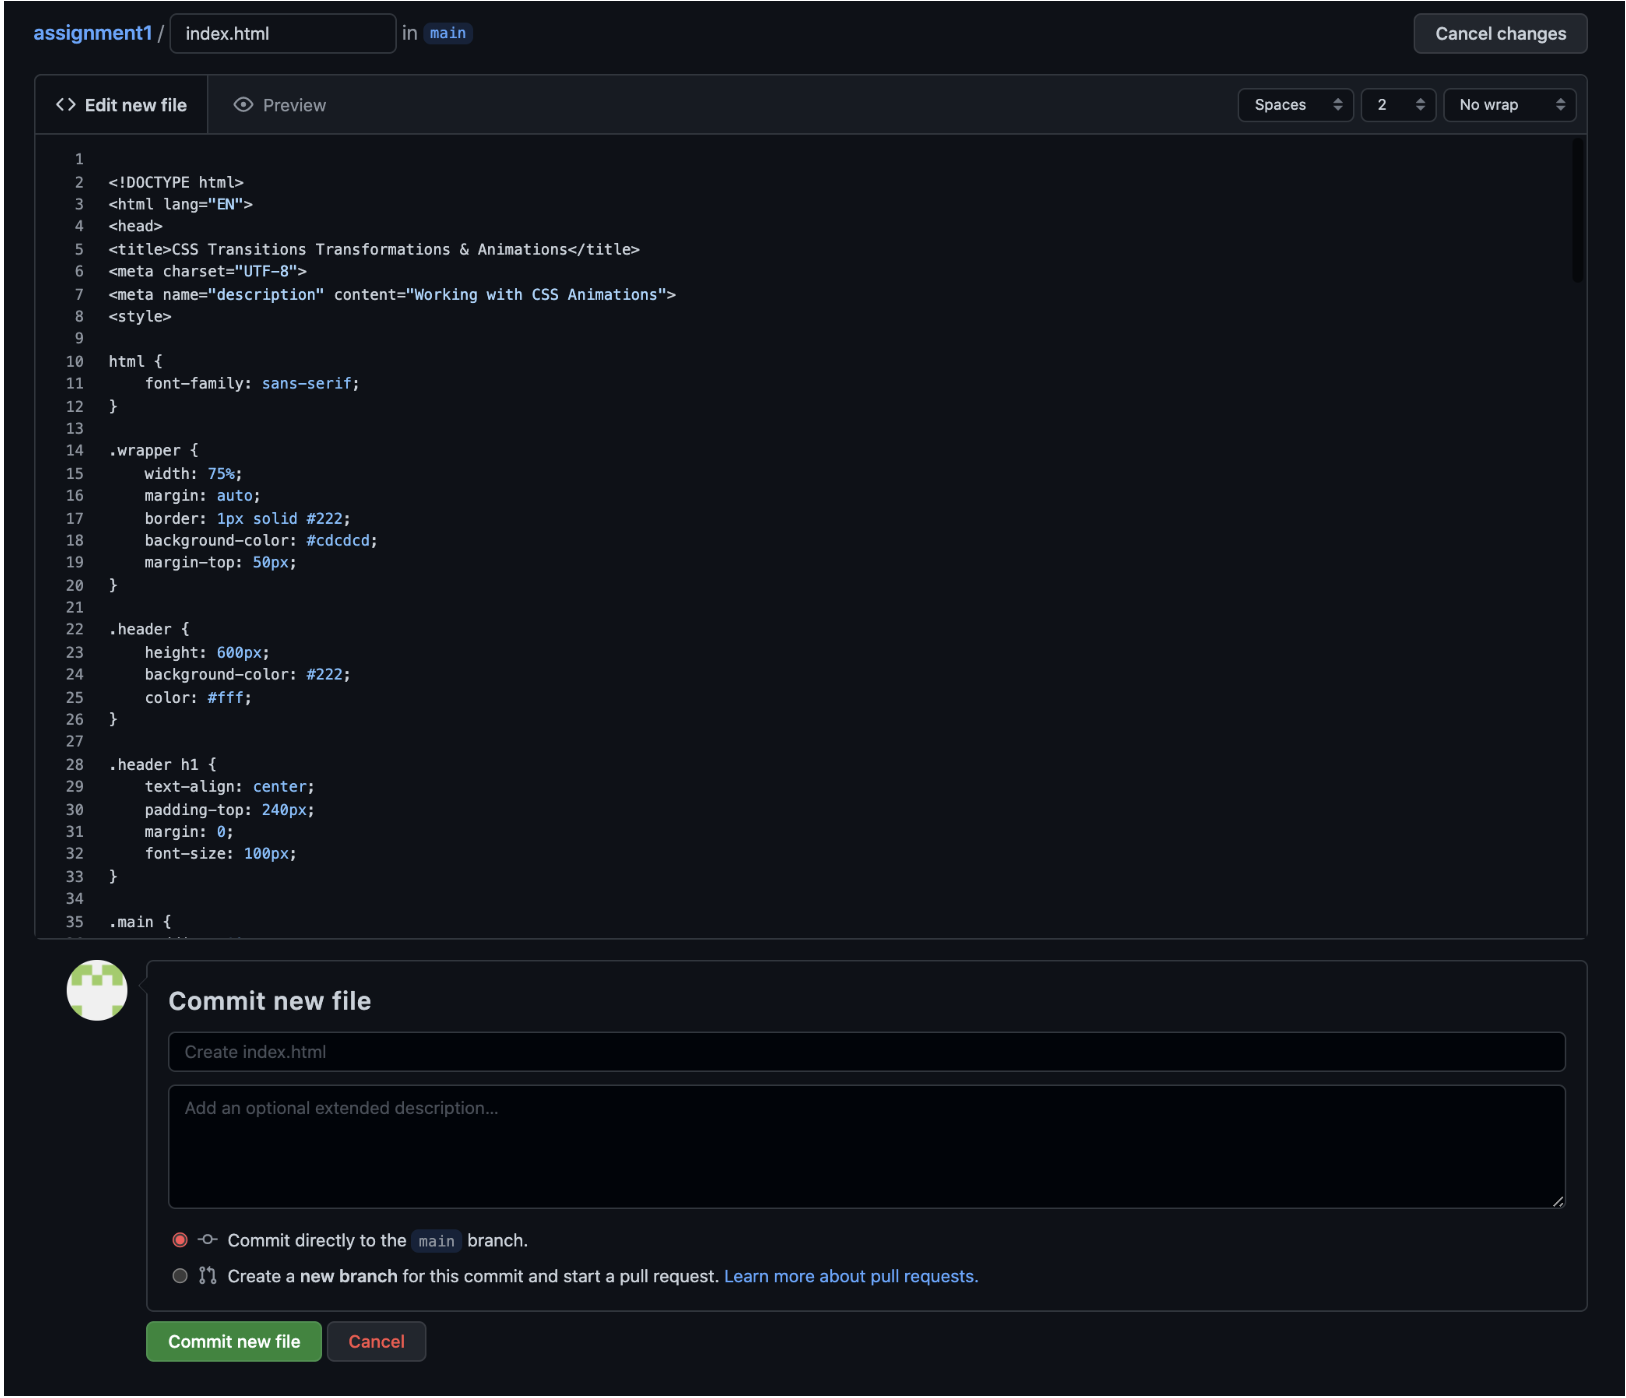
Now the file is on the server and available to be viewed on the link that was provided.
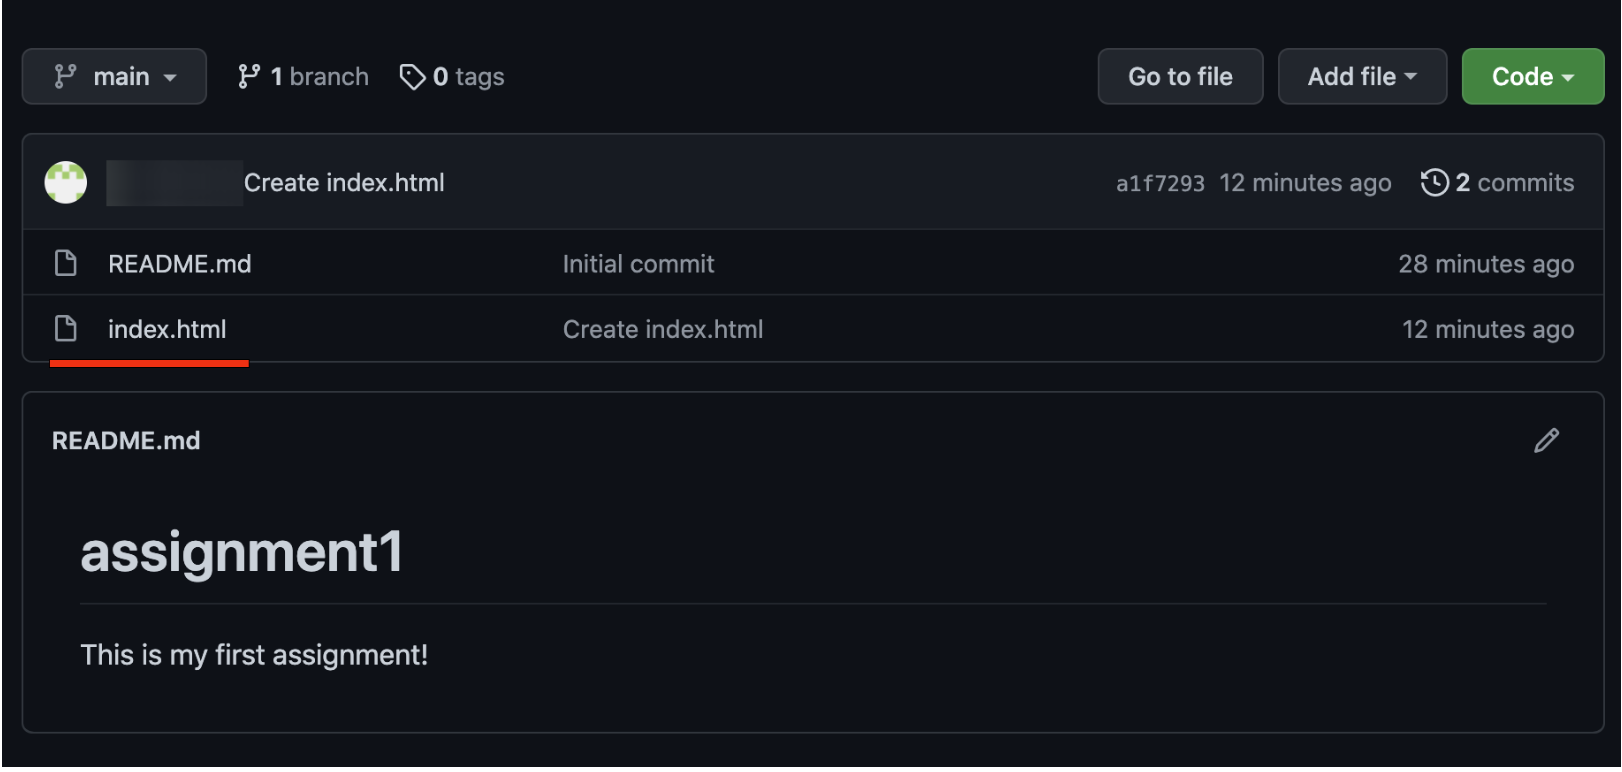
You can add more HTML and CSS files and link them accordingly.
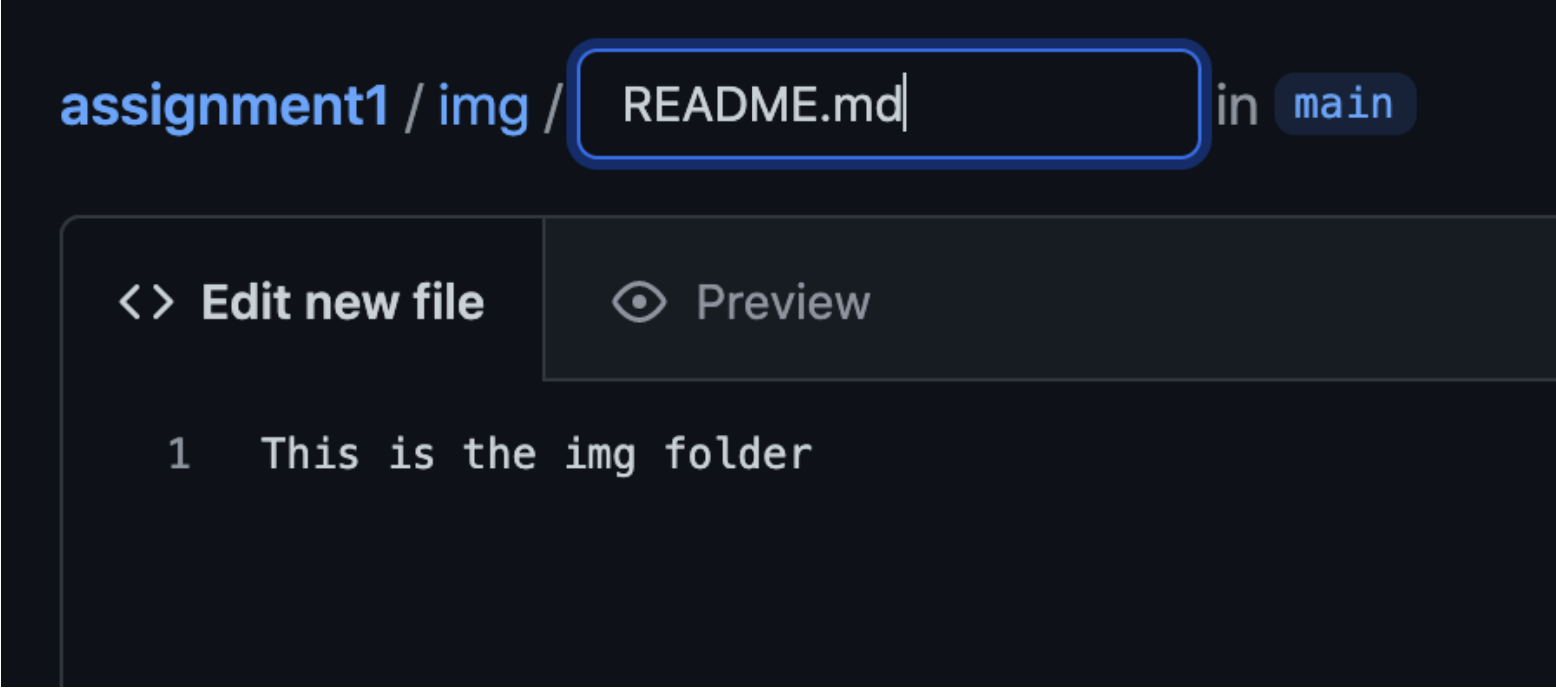
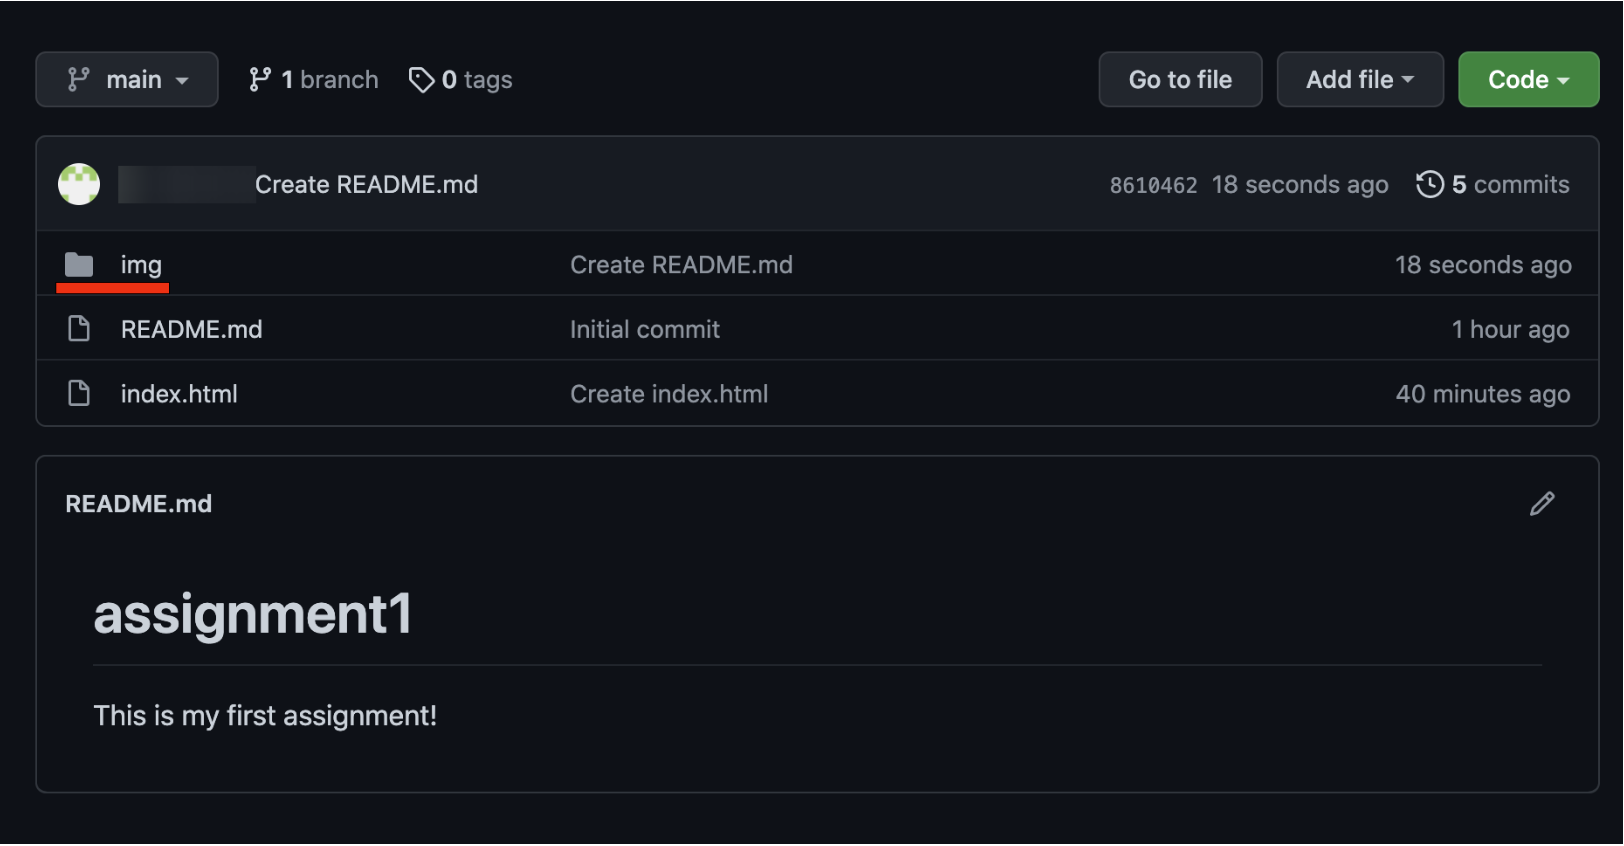
Note: To add a new folder to a repository go to “Add File” and write the name of the folder with a / EX foldername/ and in the next box put a sample file. You can use a README.md or a text file.
Categorised in: Lectures, Portfolio, WEBD 150
This post was written by amax
Comments are closed here.